

OS 환경 : Oracle Linux 9.6 (64bit)
DB 환경 : Oracle Database 19.28.0.0
방법 : Oracle Linux 9.6에 Oracle 19c RAC 설치 가이드
본문에서는 Oracle Linux 9.6에 Oracle 19c RAC를 설치하는 방법을 설명함(oracleasm library 3버전을 이용함)
별도의 유저를 나누지 않고 oracle 유저 하나로만 grid, db를 모두 설치함
그리고 Linux 9 버전에 19c를 설치하는 경우 최소 RU가 19.19이기때문에 꼭 19.19 이상을 설치해줘야함
OS 설치는 아래 게시물 참조
Oracle linux 9.6 설치 가이드( https://positivemh.tistory.com/1284 )
1번 노드 hostname : oel19db1
2번 노드 hostname : oel19db2
*본문에 2번노드 표시가 없으면 모두 1번 노드에서 작업
하드웨어 설정
Oracle Linux 9.6 설치 가이드를 보고 설치한 경우
OEL9.6 폴더에 설치했을텐데
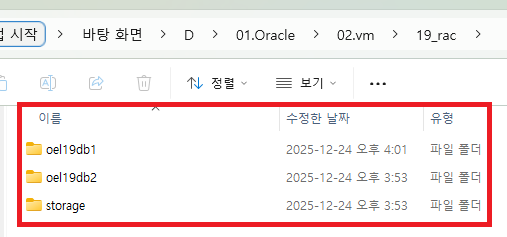
19c_rac라는 폴더를 하나 만들어서 그안에 폴더를 통째로 이동시켜줌
OEL9.6 폴더는 oel19db1로 폴더명을 변경시켜주고 하나 더 복제해서 oel19db2로 폴더명을 변경시켜줌
19c_rac 폴더에 아래와 같이 storage 라는 폴더도 생성해줌(공유 스토리지용 경로로 사용예정)
.vmx파일을 실행하면 vmware가 실행됨

Edit virtual machine settings 선택

메모리 10gb로 수정(8gb도 가능)

Processors 2, 2로 변경(1, 1도 가능) 이후 Add 선택

Hard Disk 선택

SCSI 선택

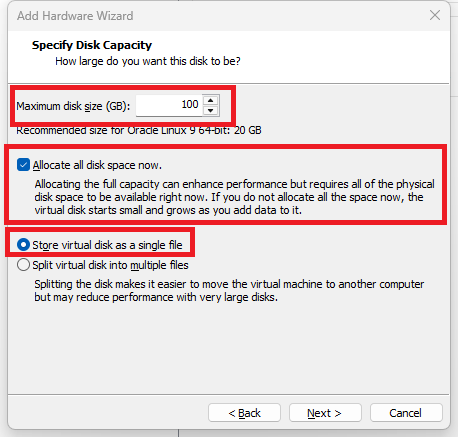
Create a new virtual disk 선택

100GB 입력 후 Store virtual disk as a single file 선택
추가 디스크 위치 선택 - storage 폴더에 생성(공유경로로 사용예정)

추가된 디스크 선택 후 Advanced 선택

SCSI 1:0 으로 선택 후 OK

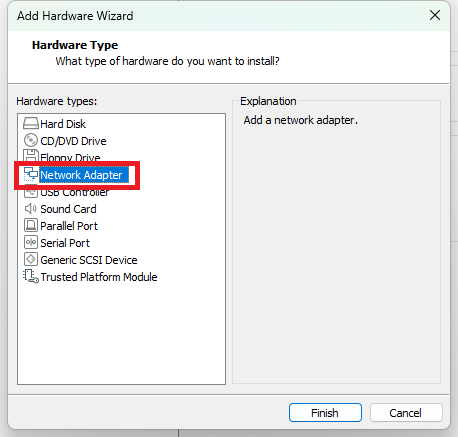
네트워크 어댑터 추가를 위해 Add - Network Adapter 선택Network Adapter 선택
Host_only 선택

현재 vmware(Oracle Enterprise Linux 8.4)를 우클릭 - Rename

oel19db1로 변경

vmware 프로그램 종료 후 19_rac\oel19db1\Oracle Linux 9 64-bit.vmx 메모장으로 열기
제일 밑에 아래 내용 추가 후 저장
|
1
2
3
4
|
disk.locking = "FALSE"
diskLib.dataCacheMaxSize = "0"
scsi1.sharedBus = "virtual"
scsi1:0.deviceType = "disk"
|
1번 OS 기동, 기동 시 아래 메세지 발생 시 I copied it 선택

이어서 oel19db2도 .vmx 파일 실행

cpu, memort 세팅은 동일하게 진행

Add - Hard disk 선택

SCSI 선택

공유 스토리지를 사용할것이기 때문에 Use an existing virtual disk 선택

storage 경로에 있는 vmdk 파일 선택

등록된 디스크 - Advanced 선택

SCSI 1:0 으로 선택 후 OK

Network Adapter도 등록 후 Advanced 선택 후 MAC Address 변경(Generate 선택)

두번째 Network Adapter도 Host-only로 변경 후 Advanced 선택
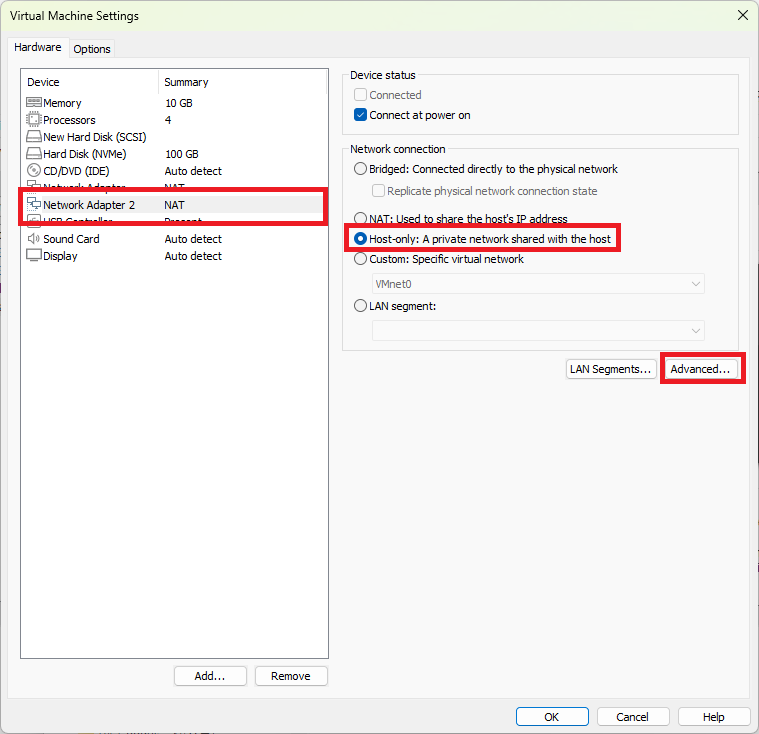
MAC Address 변경(Generate 선택)

vmware 프로그램 종료 후 19_rac\oel19db2\Oracle Linux 9 64-bit.vmx 메모장으로 열기
제일 밑에 아래 내용 추가 후 저장
|
1
2
3
4
|
disk.locking = "FALSE"
diskLib.dataCacheMaxSize = "0"
scsi1.sharedBus = "virtual"
scsi1:0.deviceType = "disk"
|
2번 OS 기동, 기동 시 아래 메세지 발생 시 I copied it 선택

설치파일
db 설치파일 : LINUX.X64_193000_db_home.zip
grid 설치파일 : LINUX.X64_193000_grid_home.zip
19.28 패치파일 : p37952382_190000_Linux-x86-64.zip
OPatch 최신파일 : p6880880_190000_Linux-x86-64.zip
OS 설정
노드1 OS 기동 후
/etc/hostname 확인
|
1
2
3
4
5
6
7
|
#1번 노드
# cat /etc/hostname
oel19db1
#2번 노드
# cat /etc/hostname
oel19db2
|
기존에 다른 hostname이라면 hostname 변경 후 재접속(모든 노드에서 모두 수행)
|
1
2
3
4
5
6
7
|
#1번 노드
# hostnamectl set-hostname oel19db1
# (세션 재접속)
#2번 노드
# hostnamectl set-hostname oel19db2
# (세션 재접속)
|
Network 설정
|
1
2
3
4
5
6
7
8
9
10
|
Public network(ens32)
IP/Netmask/GW
192.168.137.10/255.255.255.0/192.168.137.2 --노드1
192.168.137.20/255.255.255.0/192.168.137.2 --노드2
DNS 168.126.63.1
Private network
IP/Netmask/GW(ens34)
10.10.20.10/255.255.255.0 --노드1
10.10.20.20/255.255.255.0 --노드2
|
네트워크 설정
ifconfig 확인(모든 노드에서 수행)
|
1
2
3
4
5
6
7
8
9
10
11
12
13
14
15
16
17
18
19
20
21
22
23
|
# ifconfig
ens224: flags=4163<UP,BROADCAST,RUNNING,MULTICAST> mtu 1500
ether 00:50:56:a8:41:16 txqueuelen 1000 (Ethernet)
RX packets 77 bytes 4620 (4.5 KiB)
RX errors 0 dropped 70 overruns 0 frame 0
TX packets 70 bytes 9142 (8.9 KiB)
TX errors 0 dropped 0 overruns 0 carrier 0 collisions 0
ens256: flags=4163<UP,BROADCAST,RUNNING,MULTICAST> mtu 1500
ether 00:50:56:a8:84:b3 txqueuelen 1000 (Ethernet)
RX packets 77 bytes 4620 (4.5 KiB)
RX errors 0 dropped 69 overruns 0 frame 0
TX packets 75 bytes 9923 (9.6 KiB)
TX errors 0 dropped 0 overruns 0 carrier 0 collisions 0
lo: flags=73<UP,LOOPBACK,RUNNING> mtu 65536
inet 127.0.0.1 netmask 255.0.0.0
inet6 ::1 prefixlen 128 scopeid 0x10<host>
loop txqueuelen 1000 (Local Loopback)
RX packets 296 bytes 26212 (25.5 KiB)
RX errors 0 dropped 0 overruns 0 frame 0
TX packets 296 bytes 26212 (25.5 KiB)
TX errors 0 dropped 0 overruns 0 carrier 0 collisions 0
|
현재 ens224, ens256이 존재함
기존 연결 프로파일 확인(모든 노드에서 수행)
|
1
2
3
|
# nmcli connection show
NAME UUID TYPE DEVICE
lo 1f15970b-ef0d-43c3-a166-e282143f0098 loopback lo
|
ens224 Connection 설정
|
1
2
3
|
IP: 192.168.137.10/24
GW: 192.168.137.2
DNS: 168.126.63.1
|
connection 생성(모든 노드에서 수행)
|
1
2
|
# nmcli connection add type ethernet ifname ens224 con-name ens224
Connection 'ens224' (dafcf07c-a57c-4b22-9151-faa455b43464) successfully added.
|
IPv4 설정(모든 노드에서 수행)
|
1
2
3
4
5
6
7
8
9
10
11
12
13
14
15
|
#1번 노드
nmcli connection modify ens224 \
ipv4.method manual \
ipv4.addresses 192.168.137.10/24 \
ipv4.gateway 192.168.137.2 \
ipv4.dns 168.126.63.1 \
connection.autoconnect yes
#2번 노드
nmcli connection modify ens224 \
ipv4.method manual \
ipv4.addresses 192.168.137.20/24 \
ipv4.gateway 192.168.137.2 \
ipv4.dns 168.126.63.1 \
connection.autoconnect yes
|
활성화(모든 노드에서 수행)
|
1
2
|
# nmcli connection up ens224
Connection successfully activated (D-Bus active path: /org/freedesktop/NetworkManager/ActiveConnection/9)
|
ens256 Connection 설정(모든 노드에서 수행)
|
1
2
3
|
IP: 10.10.20.10/24
Gateway 없음
DNS 없음
|
connection 생성(모든 노드에서 수행)
|
1
2
|
# nmcli connection add type ethernet ifname ens256 con-name ens256
Connection 'ens256' (734e5625-738a-4e93-8421-75a4d9b5dea0) successfully added.
|
IPv4 설정((모든 노드에서 수행)
|
1
2
3
4
5
6
7
8
9
10
11
|
#1번 노드
nmcli connection modify ens256 \
ipv4.method manual \
ipv4.addresses 10.10.20.10/24 \
connection.autoconnect yes
#2번 노드
nmcli connection modify ens256 \
ipv4.method manual \
ipv4.addresses 10.10.20.20/24 \
connection.autoconnect yes
|
활성화(모든 노드에서 수행)
|
1
2
|
# nmcli connection up ens256
Connection successfully activated (D-Bus active path: /org/freedesktop/NetworkManager/ActiveConnection/10)
|
설정 확인(모든 노드에서 수행)
디바이스 상태 확인
|
1
2
3
4
5
6
7
8
9
10
11
12
13
|
#1번 노드
# nmcli device status
DEVICE TYPE STATE CONNECTION
ens224 ethernet connected ens224
ens256 ethernet connected ens256
lo loopback connected (externally) lo
#2번 노드
# nmcli device status
DEVICE TYPE STATE CONNECTION
ens224 ethernet connected ens224
ens256 ethernet connected ens256
lo loopback connected (externally) lo
|
ens224와 ens256이 모두 connected 상태가 됨
IP 확인(모든 노드에서 수행)
|
1
2
3
4
5
6
7
8
9
10
11
12
13
14
15
16
17
18
19
20
21
22
23
24
25
26
27
28
29
30
31
32
33
34
35
36
37
|
#1번 노드
# ip addr show ens224
3: ens224: <BROADCAST,MULTICAST,UP,LOWER_UP> mtu 1500 qdisc mq state UP group default qlen 1000
link/ether 00:50:56:a8:41:16 brd ff:ff:ff:ff:ff:ff
altname enp19s0
inet 192.168.137.10/24 brd 192.168.137.255 scope global noprefixroute ens224
valid_lft forever preferred_lft forever
inet6 fe80::10a7:18a2:140f:a950/64 scope link noprefixroute
valid_lft forever preferred_lft forever
# ip addr show ens256
4: ens256: <BROADCAST,MULTICAST,UP,LOWER_UP> mtu 1500 qdisc mq state UP group default qlen 1000
link/ether 00:50:56:a8:84:b3 brd ff:ff:ff:ff:ff:ff
altname enp27s0
inet 10.10.20.10/24 brd 10.10.20.255 scope global noprefixroute ens256
valid_lft forever preferred_lft forever
inet6 fe80::fc29:9672:9bc:ec0e/64 scope link noprefixroute
valid_lft forever preferred_lft forever
#2번 노드
# ip addr show ens224
3: ens224: <BROADCAST,MULTICAST,UP,LOWER_UP> mtu 1500 qdisc mq state UP group default qlen 1000
link/ether 00:50:56:a8:f0:50 brd ff:ff:ff:ff:ff:ff
altname enp19s0
inet 192.168.137.20/24 brd 192.168.137.255 scope global noprefixroute ens224
valid_lft forever preferred_lft forever
inet6 fe80::2e30:f6b4:f571:5add/64 scope link noprefixroute
valid_lft forever preferred_lft forever
# ip addr show ens256
4: ens256: <BROADCAST,MULTICAST,UP,LOWER_UP> mtu 1500 qdisc mq state UP group default qlen 1000
link/ether 00:50:56:a8:c6:76 brd ff:ff:ff:ff:ff:ff
altname enp27s0
inet 10.10.20.20/24 brd 10.10.20.255 scope global noprefixroute ens256
valid_lft forever preferred_lft forever
inet6 fe80::dfa:2d0f:64d3:b04/64 scope link noprefixroute
valid_lft forever preferred_lft forever
|
모두 정상
/etc/hosts 설정, 아래 내용 추가 후 저장
|
1
2
3
4
5
6
7
8
9
10
11
12
13
14
15
16
17
|
# vi /etc/hosts
127.0.0.1 localhost localhost.localdomain localhost4 localhost4.localdomain4
::1 localhost localhost.localdomain localhost6 localhost6.localdomain6
##Public
192.168.137.10 oel19db1
192.168.137.20 oel19db2
##Private
10.10.20.10 oel19db1-priv
10.10.20.20 oel19db2-priv
##Virtual
192.168.137.100 oel19db1-vip
192.168.137.200 oel19db2-vip
##SCAN
192.168.137.150 oel19db-scan
|
디스크는 100gb짜리 하나를 마운트 했고 data용, reco용, ocr용 이렇게 크게 3개로 나눔
디스크 1개 추가 마운트 후 확인(1번 노드에서 수행)
|
1
2
3
4
5
6
7
8
9
10
11
12
13
14
15
16
17
18
19
20
21
22
23
24
25
26
27
28
29
30
31
|
# fdisk -l
Disk /dev/sda: 100 GiB, 107374182400 bytes, 209715200 sectors
Disk model: Virtual disk
Units: sectors of 1 * 512 = 512 bytes
Sector size (logical/physical): 512 bytes / 512 bytes
I/O size (minimum/optimal): 512 bytes / 512 bytes
Disklabel type: dos
Disk identifier: 0x95bec2cc
Device Boot Start End Sectors Size Id Type
/dev/sda1 * 2048 1050623 1048576 512M 83 Linux
/dev/sda2 1050624 209715199 208664576 99.5G 8e Linux LVM
Disk /dev/mapper/ol-root: 91.5 GiB, 98243182592 bytes, 191881216 sectors
Units: sectors of 1 * 512 = 512 bytes
Sector size (logical/physical): 512 bytes / 512 bytes
I/O size (minimum/optimal): 512 bytes / 512 bytes
Disk /dev/mapper/ol-swap: 8 GiB, 8589934592 bytes, 16777216 sectors
Units: sectors of 1 * 512 = 512 bytes
Sector size (logical/physical): 512 bytes / 512 bytes
I/O size (minimum/optimal): 512 bytes / 512 bytes
Disk /dev/sdb: 100 GiB, 107374182400 bytes, 209715200 sectors
Disk model: Virtual disk
Units: sectors of 1 * 512 = 512 bytes
Sector size (logical/physical): 512 bytes / 512 bytes
I/O size (minimum/optimal): 512 bytes / 4194304 bytes
|
현재 100gb로 마운트된 디스크는 /dev/sdb임
fdisk 명령으로 파티션 나누기(1번 노드에서 수행)
각각 primary 파티션 30G, 30G 씩 총 2개, Extended 파티션 20G 1개, Logical 파티션 4G, 4G, 4G 총 3개를 생성하는 명령임
아래 DEVICE에 알맞은 디스크 이름 입력
|
1
2
3
4
5
6
7
8
9
10
11
12
13
14
15
16
17
18
19
20
21
22
23
24
25
26
27
28
29
30
31
32
33
34
35
36
37
38
39
40
41
42
43
|
# vi fdisk.sh
#!/bin/bash
DEVICE="/dev/sdb"
fdisk "$DEVICE" <<'EOF'
o
n
p
1
+30G
n
p
2
+30G
n
e
3
+20G
n
l
+4G
n
l
+4G
n
l
+4G
p
w
EOF
|
실행권한 부여 후 실행(1번 노드에서 수행)
|
1
2
3
4
5
6
7
8
9
10
11
12
13
14
15
16
17
18
19
20
21
22
23
24
25
26
27
28
29
30
31
32
33
34
35
36
37
38
39
40
41
42
43
44
45
46
47
48
49
50
51
52
53
54
55
56
57
58
59
60
61
62
63
64
65
66
67
68
69
70
71
72
73
74
75
76
77
78
79
80
81
82
83
84
85
86
|
# chmod u+x fdisk.sh
# sh fdisk.sh
Welcome to fdisk (util-linux 2.37.4).
Changes will remain in memory only, until you decide to write them.
Be careful before using the write command.
Command (m for help): Created a new DOS disklabel with disk identifier 0x00dd6752.
Command (m for help):
Command (m for help): Partition type
p primary (0 primary, 0 extended, 4 free)
e extended (container for logical partitions)
Select (default p): Partition number (1-4, default 1): First sector (8192-209715199, default 8192): Last sector, +/-sectors or +/-size{K,M,G,T,P} (8192-209715199, default 209715199):
Created a new partition 1 of type 'Linux' and of size 30 GiB.
Command (m for help):
Command (m for help): Partition type
p primary (1 primary, 0 extended, 3 free)
e extended (container for logical partitions)
Select (default p): Partition number (2-4, default 2): First sector (62922752-209715199, default 62922752): Last sector, +/-sectors or +/-size{K,M,G,T,P} (62922752-209715199, default 209715199):
Created a new partition 2 of type 'Linux' and of size 30 GiB.
Command (m for help):
Command (m for help): Partition type
p primary (2 primary, 0 extended, 2 free)
e extended (container for logical partitions)
Select (default p): Partition number (3,4, default 3): First sector (125837312-209715199, default 125837312): Last sector, +/-sectors or +/-size{K,M,G,T,P} (125837312-209715199, default 209715199):
Created a new partition 3 of type 'Extended' and of size 20 GiB.
Command (m for help):
Command (m for help): Partition type
p primary (2 primary, 1 extended, 1 free)
l logical (numbered from 5)
Select (default p):
Adding logical partition 5
First sector (125845504-167780351, default 125845504): Last sector, +/-sectors or +/-size{K,M,G,T,P} (125845504-167780351, default 167780351):
Created a new partition 5 of type 'Linux' and of size 4 GiB.
Command (m for help):
Command (m for help): Partition type
p primary (2 primary, 1 extended, 1 free)
l logical (numbered from 5)
Select (default p):
Adding logical partition 6
First sector (134242304-167780351, default 134242304): Last sector, +/-sectors or +/-size{K,M,G,T,P} (134242304-167780351, default 167780351):
Created a new partition 6 of type 'Linux' and of size 4 GiB.
Command (m for help):
Command (m for help): Partition type
p primary (2 primary, 1 extended, 1 free)
l logical (numbered from 5)
Select (default p):
Adding logical partition 7
First sector (142639104-167780351, default 142639104): Last sector, +/-sectors or +/-size{K,M,G,T,P} (142639104-167780351, default 167780351):
Created a new partition 7 of type 'Linux' and of size 4 GiB.
Command (m for help):
Command (m for help):
Disk /dev/sdb: 100 GiB, 107374182400 bytes, 209715200 sectors
Disk model: Virtual disk
Units: sectors of 1 * 512 = 512 bytes
Sector size (logical/physical): 512 bytes / 512 bytes
I/O size (minimum/optimal): 512 bytes / 4194304 bytes
Disklabel type: dos
Disk identifier: 0x00dd6752
Device Boot Start End Sectors Size Id Type
/dev/sdb1 8192 62922751 62914560 30G 83 Linux
/dev/sdb2 62922752 125837311 62914560 30G 83 Linux
/dev/sdb3 125837312 167780351 41943040 20G 5 Extended
/dev/sdb5 125845504 134234111 8388608 4G 83 Linux
/dev/sdb6 134242304 142630911 8388608 4G 83 Linux
/dev/sdb7 142639104 151027711 8388608 4G 83 Linux
Command (m for help): The partition table has been altered.
Calling ioctl() to re-read partition table.
Syncing disks.
|
정상적으로 디스크 파티션이 나뉘어짐
/dev/sdb1을 DATA, /dev/sdb2를 RECO, /dev/sdb5~7을 ocr vote 영역으로 설정 예정임
2번 노드에서 디스크 확인
|
1
2
3
4
5
6
7
8
9
10
11
12
13
14
15
16
|
# fdisk /dev/sdb -l
Disk /dev/sdb: 100 GiB, 107374182400 bytes, 209715200 sectors
Disk model: Virtual disk
Units: sectors of 1 * 512 = 512 bytes
Sector size (logical/physical): 512 bytes / 512 bytes
I/O size (minimum/optimal): 512 bytes / 4194304 bytes
Disklabel type: dos
Disk identifier: 0x00dd6752
Device Boot Start End Sectors Size Id Type
/dev/sdb1 8192 62922751 62914560 30G 83 Linux
/dev/sdb2 62922752 125837311 62914560 30G 83 Linux
/dev/sdb3 125837312 167780351 41943040 20G 5 Extended
/dev/sdb5 125845504 134234111 8388608 4G 83 Linux
/dev/sdb6 134242304 142630911 8388608 4G 83 Linux
/dev/sdb7 142639104 151027711 8388608 4G 83 Linux
|
2번 노드에서도 잘보임
오라클 설치 전 사전 설정
preinstall rpm 설치
공식홈페이지에서 preinstall rpm 다운로드 후 서버에 업로드
https://yum.oracle.com/repo/OracleLinux/OL9/appstream/x86_64/getPackage/oracle-database-preinstall-19c-1.0-1.el9.x86_64.rpm
또는 curl로 서버에 직접 다운로드(모든 노드에서 수행)
|
1
|
# curl -o oracle-database-preinstall-19c-1.0-1.el9.x86_64.rpm https://yum.oracle.com/repo/OracleLinux/OL9/appstream/x86_64/getPackage/oracle-database-preinstall-19c-1.0-1.el9.x86_64.rpm
|
preinstall 패키지 설치(모든 노드에서 수행)
perinstall 패키지 설치 시 os 커널 파라미터가 설정되고, oracle 유저와 oinstall, dba 등 설치에 필요한 권한 유저가 생성되고, 필요한 패키지가 설치됨
|
1
2
3
4
5
6
7
8
9
10
11
12
13
14
15
16
17
18
19
20
21
22
23
24
25
26
27
28
29
30
31
32
33
34
35
36
37
38
39
40
41
42
43
44
45
46
47
48
49
50
51
52
53
54
55
56
57
58
59
60
61
62
63
64
65
66
67
68
69
70
71
72
73
74
75
76
77
78
79
80
81
82
83
84
85
86
87
88
89
90
91
92
93
94
95
96
97
98
99
100
101
102
103
104
105
106
107
108
109
110
111
112
113
114
115
116
117
118
119
120
121
122
123
124
125
126
127
128
|
# dnf -y localinstall oracle-database-preinstall-19c-1.0-1.el9.x86_64.rpm
Last metadata expiration check: 0:11:38 ago on Sat 20 Dec 2025 05:34:13 PM KST.
Dependencies resolved.
=====================================================================================================================================================================
Package Architecture Version Repository Size
=====================================================================================================================================================================
Installing:
oracle-database-preinstall-19c x86_64 1.0-1.el9 @commandline 33 k
Installing dependencies:
gssproxy x86_64 0.8.4-7.el9 ol9_baseos_latest 120 k
initscripts x86_64 10.11.8-4.0.1.el9 ol9_baseos_latest 285 k
ksh x86_64 3:1.0.6-7.0.1.el9_6.2 ol9_appstream 889 k
libaio-devel x86_64 0.3.111-13.el9 ol9_appstream 11 k
libev x86_64 4.33-6.el9 ol9_baseos_latest 56 k
libnfsidmap x86_64 1:2.5.4-38.0.1.el9 ol9_baseos_latest 71 k
libnsl x86_64 2.34-168.0.1.el9 ol9_baseos_latest 65 k
libverto-libev x86_64 0.3.2-3.el9 ol9_baseos_latest 14 k
lm_sensors-libs x86_64 3.6.0-10.el9 ol9_appstream 42 k
nfs-utils x86_64 1:2.5.4-38.0.1.el9 ol9_baseos_latest 518 k
pcp-conf x86_64 6.3.7-5.0.4.el9 ol9_appstream 41 k
pcp-libs x86_64 6.3.7-5.0.4.el9 ol9_appstream 654 k
rpcbind x86_64 1.2.6-7.el9 ol9_baseos_latest 69 k
sssd-nfs-idmap x86_64 2.9.6-4.0.1.el9 ol9_baseos_latest 45 k
sysstat x86_64 12.5.4-9.0.2.el9 ol9_appstream 541 k
Transaction Summary
=====================================================================================================================================================================
Install 16 Packages
Total size: 3.4 M
Total download size: 3.3 M
Installed size: 9.4 M
Downloading Packages:
(1/15): libev-4.33-6.el9.x86_64.rpm 281 kB/s | 56 kB 00:00
(2/15): gssproxy-0.8.4-7.el9.x86_64.rpm 564 kB/s | 120 kB 00:00
(3/15): initscripts-10.11.8-4.0.1.el9.x86_64.rpm 1.0 MB/s | 285 kB 00:00
(4/15): libnfsidmap-2.5.4-38.0.1.el9.x86_64.rpm 1.0 MB/s | 71 kB 00:00
(5/15): libverto-libev-0.3.2-3.el9.x86_64.rpm 383 kB/s | 14 kB 00:00
(6/15): rpcbind-1.2.6-7.el9.x86_64.rpm 1.7 MB/s | 69 kB 00:00
(7/15): nfs-utils-2.5.4-38.0.1.el9.x86_64.rpm 4.0 MB/s | 518 kB 00:00
(8/15): ksh-1.0.6-7.0.1.el9_6.2.x86_64.rpm 10 MB/s | 889 kB 00:00
(9/15): libaio-devel-0.3.111-13.el9.x86_64.rpm 302 kB/s | 11 kB 00:00
(10/15): lm_sensors-libs-3.6.0-10.el9.x86_64.rpm 893 kB/s | 42 kB 00:00
(11/15): pcp-conf-6.3.7-5.0.4.el9.x86_64.rpm 1.1 MB/s | 41 kB 00:00
(12/15): pcp-libs-6.3.7-5.0.4.el9.x86_64.rpm 12 MB/s | 654 kB 00:00
(13/15): sysstat-12.5.4-9.0.2.el9.x86_64.rpm 12 MB/s | 541 kB 00:00
(14/15): libnsl-2.34-168.0.1.el9.x86_64.rpm 45 kB/s | 65 kB 00:01
(15/15): sssd-nfs-idmap-2.9.6-4.0.1.el9.x86_64.rpm 34 kB/s | 45 kB 00:01
---------------------------------------------------------------------------------------------------------------------------------------------------------------------
Total 2.0 MB/s | 3.3 MB 00:01
Oracle Linux 9 BaseOS Latest (x86_64) 189 kB/s | 6.2 kB 00:00
Importing GPG key 0x8D8B756F:
Userid : "Oracle Linux (release key 1) <secalert_us@oracle.com>"
Fingerprint: 3E6D 826D 3FBA B389 C2F3 8E34 BC4D 06A0 8D8B 756F
From : /etc/pki/rpm-gpg/RPM-GPG-KEY-oracle
Key imported successfully
Importing GPG key 0x8B4EFBE6:
Userid : "Oracle Linux (backup key 1) <secalert_us@oracle.com>"
Fingerprint: 9822 3175 9C74 6706 5D0C E9B2 A7DD 0708 8B4E FBE6
From : /etc/pki/rpm-gpg/RPM-GPG-KEY-oracle
Key imported successfully
Running transaction check
Transaction check succeeded.
Running transaction test
Transaction test succeeded.
Running transaction
Preparing : 1/1
Installing : libnfsidmap-1:2.5.4-38.0.1.el9.x86_64 1/16
Installing : pcp-conf-6.3.7-5.0.4.el9.x86_64 2/16
Installing : pcp-libs-6.3.7-5.0.4.el9.x86_64 3/16
Installing : lm_sensors-libs-3.6.0-10.el9.x86_64 4/16
Installing : sysstat-12.5.4-9.0.2.el9.x86_64 5/16
Running scriptlet: sysstat-12.5.4-9.0.2.el9.x86_64 5/16
Created symlink /etc/systemd/system/multi-user.target.wants/sysstat.service → /usr/lib/systemd/system/sysstat.service.
Created symlink /etc/systemd/system/sysstat.service.wants/sysstat-collect.timer → /usr/lib/systemd/system/sysstat-collect.timer.
Created symlink /etc/systemd/system/sysstat.service.wants/sysstat-summary.timer → /usr/lib/systemd/system/sysstat-summary.timer.
Installing : libaio-devel-0.3.111-13.el9.x86_64 6/16
Installing : ksh-3:1.0.6-7.0.1.el9_6.2.x86_64 7/16
Running scriptlet: ksh-3:1.0.6-7.0.1.el9_6.2.x86_64 7/16
Running scriptlet: rpcbind-1.2.6-7.el9.x86_64 8/16
Installing : rpcbind-1.2.6-7.el9.x86_64 8/16
Running scriptlet: rpcbind-1.2.6-7.el9.x86_64 8/16
Created symlink /etc/systemd/system/multi-user.target.wants/rpcbind.service → /usr/lib/systemd/system/rpcbind.service.
Created symlink /etc/systemd/system/sockets.target.wants/rpcbind.socket → /usr/lib/systemd/system/rpcbind.socket.
Installing : libnsl-2.34-168.0.1.el9.x86_64 9/16
Installing : libev-4.33-6.el9.x86_64 10/16
Installing : libverto-libev-0.3.2-3.el9.x86_64 11/16
Installing : gssproxy-0.8.4-7.el9.x86_64 12/16
Running scriptlet: gssproxy-0.8.4-7.el9.x86_64 12/16
Running scriptlet: nfs-utils-1:2.5.4-38.0.1.el9.x86_64 13/16
Installing : nfs-utils-1:2.5.4-38.0.1.el9.x86_64 13/16
Running scriptlet: nfs-utils-1:2.5.4-38.0.1.el9.x86_64 13/16
Installing : initscripts-10.11.8-4.0.1.el9.x86_64 14/16
Running scriptlet: initscripts-10.11.8-4.0.1.el9.x86_64 14/16
Created symlink /etc/systemd/system/sysinit.target.wants/import-state.service → /usr/lib/systemd/system/import-state.service.
Created symlink /etc/systemd/system/sysinit.target.wants/loadmodules.service → /usr/lib/systemd/system/loadmodules.service.
Running scriptlet: oracle-database-preinstall-19c-1.0-1.el9.x86_64 15/16
Installing : oracle-database-preinstall-19c-1.0-1.el9.x86_64 15/16
Installing : sssd-nfs-idmap-2.9.6-4.0.1.el9.x86_64 16/16
Running scriptlet: oracle-database-preinstall-19c-1.0-1.el9.x86_64 16/16
Running scriptlet: sssd-nfs-idmap-2.9.6-4.0.1.el9.x86_64 16/16
Verifying : gssproxy-0.8.4-7.el9.x86_64 1/16
Verifying : initscripts-10.11.8-4.0.1.el9.x86_64 2/16
Verifying : libev-4.33-6.el9.x86_64 3/16
Verifying : libnfsidmap-1:2.5.4-38.0.1.el9.x86_64 4/16
Verifying : libnsl-2.34-168.0.1.el9.x86_64 5/16
Verifying : libverto-libev-0.3.2-3.el9.x86_64 6/16
Verifying : nfs-utils-1:2.5.4-38.0.1.el9.x86_64 7/16
Verifying : rpcbind-1.2.6-7.el9.x86_64 8/16
Verifying : sssd-nfs-idmap-2.9.6-4.0.1.el9.x86_64 9/16
Verifying : ksh-3:1.0.6-7.0.1.el9_6.2.x86_64 10/16
Verifying : libaio-devel-0.3.111-13.el9.x86_64 11/16
Verifying : lm_sensors-libs-3.6.0-10.el9.x86_64 12/16
Verifying : pcp-conf-6.3.7-5.0.4.el9.x86_64 13/16
Verifying : pcp-libs-6.3.7-5.0.4.el9.x86_64 14/16
Verifying : sysstat-12.5.4-9.0.2.el9.x86_64 15/16
Verifying : oracle-database-preinstall-19c-1.0-1.el9.x86_64 16/16
Installed:
gssproxy-0.8.4-7.el9.x86_64 initscripts-10.11.8-4.0.1.el9.x86_64 ksh-3:1.0.6-7.0.1.el9_6.2.x86_64 libaio-devel-0.3.111-13.el9.x86_64
libev-4.33-6.el9.x86_64 libnfsidmap-1:2.5.4-38.0.1.el9.x86_64 libnsl-2.34-168.0.1.el9.x86_64 libverto-libev-0.3.2-3.el9.x86_64
lm_sensors-libs-3.6.0-10.el9.x86_64 nfs-utils-1:2.5.4-38.0.1.el9.x86_64 oracle-database-preinstall-19c-1.0-1.el9.x86_64 pcp-conf-6.3.7-5.0.4.el9.x86_64
pcp-libs-6.3.7-5.0.4.el9.x86_64 rpcbind-1.2.6-7.el9.x86_64 sssd-nfs-idmap-2.9.6-4.0.1.el9.x86_64 sysstat-12.5.4-9.0.2.el9.x86_64
Complete!
|
자동 설정 후 수동설정 파일 확인필요(모든 노드에서 수행)
/etc/sysctl.conf에 io_uring_disabled, io_uring_group 추가(asmlib용)
|
1
2
3
4
5
6
7
8
9
10
11
12
13
14
15
16
17
|
# vi /etc/sysctl.conf
fs.file-max = 6815744
kernel.sem = 250 32000 100 128
kernel.shmmni = 4096
kernel.shmall = 1310720
kernel.shmmax = 5368709120
kernel.panic_on_oops = 1
net.core.rmem_default = 262144
net.core.rmem_max = 4194304
net.core.wmem_default = 262144
net.core.wmem_max = 1048576
net.ipv4.conf.all.rp_filter = 2
net.ipv4.conf.default.rp_filter = 2
fs.aio-max-nr = 1048576
net.ipv4.ip_local_port_range = 9000 65500
kernel.io_uring_disabled = 0
kernel.io_uring_group = 54321
|
*kernel.shmall, kernel.shmmax 은 서버에 물리 메모리의 절반으로 설정 필요(byte 단위), shmall은 page 단위로 설정 필요
현재 서버의 물리 메모리를 10gb로 잡았기 때문에 shmmax는 물리메모리의 절반인 5gb를 byte로 변경해 적용함(5*1024*1024*1024)
*kernel.io_uring_group에 들어가는 54321은 grid 설치 유저의 gid를 입력해야함(id {유저명} 명령으로 확인)
shmmax를 물리메모리의 60%로 설정을 원하는 경우 + shmall을 page 단위로 설정하려는 경우 아래 스크립트 활용
|
1
2
3
4
5
6
7
8
9
10
11
12
13
14
15
16
17
18
19
|
#!/bin/bash
# Get total memory size in KB
mem_kb=$(free -k | awk '/^Mem:/ {print $2}')
# Get system page size in bytes
page_size=$(getconf PAGE_SIZE)
# Calculate shmmax: total memory in bytes × 60%
shmmax=$(echo "$mem_kb * 1024 * 6 / 10" | bc)
# Calculate shmall: shmmax divided by page size
shmall=$(echo "$shmmax / $page_size" | bc)
# Output results
echo "Total Memory (KB): $mem_kb"
echo "Page Size (bytes): $page_size"
echo "Calculated SHMMAX (bytes): $shmmax"
echo "Calculated SHMALL (pages): $shmall"
|
여기서 나온값을 넣어주면됨
잘 입력되었는지 확인(모든 노드에서 수행)
|
1
2
3
4
5
6
7
8
9
10
11
12
13
14
15
16
17
|
# sysctl -p
fs.file-max = 6815744
kernel.sem = 250 32000 100 128
kernel.shmmni = 4096
kernel.shmall = 1310720
kernel.shmmax = 5368709120
kernel.panic_on_oops = 1
net.core.rmem_default = 262144
net.core.rmem_max = 4194304
net.core.wmem_default = 262144
net.core.wmem_max = 1048576
net.ipv4.conf.all.rp_filter = 2
net.ipv4.conf.default.rp_filter = 2
fs.aio-max-nr = 1048576
net.ipv4.ip_local_port_range = 9000 65500
kernel.io_uring_disabled = 0
kernel.io_uring_group = 54321
|
아래 파일 내용 확인(모든 노드에서 수행)
|
1
2
3
4
5
6
7
8
9
10
11
12
13
14
15
16
17
18
19
20
21
22
23
24
25
26
27
28
29
30
31
32
|
# cat /etc/security/limits.d/oracle-database-preinstall-19c.conf
# oracle-database-preinstall-19c setting for nofile soft limit is 1024
oracle soft nofile 1024
# oracle-database-preinstall-19c setting for nofile hard limit is 65536
oracle hard nofile 65536
# oracle-database-preinstall-19c setting for nproc soft limit is 16384
# refer orabug15971421 for more info.
oracle soft nproc 16384
# oracle-database-preinstall-19c setting for nproc hard limit is 16384
oracle hard nproc 16384
# oracle-database-preinstall-19c setting for stack soft limit is 10240KB
oracle soft stack 10240
# oracle-database-preinstall-19c setting for stack hard limit is 32768KB
oracle hard stack 32768
# oracle-database-preinstall-19c setting for memlock hard limit is maximum of 128GB on x86_64 or 3GB on x86 OR 90 % of RAM
oracle hard memlock 134217728
# oracle-database-preinstall-19c setting for memlock soft limit is maximum of 128GB on x86_64 or 3GB on x86 OR 90% of RAM
oracle soft memlock 134217728
# oracle-database-preinstall-19c setting for data soft limit is 'unlimited'
oracle soft data unlimited
# oracle-database-preinstall-19c setting for data hard limit is 'unlimited'
oracle hard data unlimited
|
패스워드 설정(모든 노드에서 수행)
|
1
|
# passwd oracle
|
selinux disabled 설정(모든 노드에서 수행)
|
1
2
|
# vi /etc/selinux/config
SELINUX=disabled
|
불필요한 서비스 정지 및 방화벽 해제(모든 노드에서 수행)
|
1
2
3
4
5
6
7
8
9
10
11
12
13
14
15
16
17
18
19
20
21
22
|
#
systemctl stop firewalld
systemctl disable firewalld
systemctl stop bluetooth
systemctl disable bluetooth
systemctl stop chronyd
systemctl disable chronyd
mv /etc/chrony.conf /etc/chrony.conf.bak
systemctl stop ntpdate
systemctl disable ntpdate
systemctl stop avahi-daemon.socket
systemctl disable avahi-daemon.socket
systemctl stop avahi-daemon
systemctl disable avahi-daemon
systemctl stop libvirtd
systemctl disable libvirtd
|
설치 경로 생성(모든 노드에서 수행)
|
1
2
3
4
5
|
# mkdir -p /app/oracle/product/19c/
# mkdir -p /app/grid/product/19c
# mkdir -p /app/media
# chown -R oracle:dba /app
# chmod -R 775 /app
|
디스크 권한 부여(모든 노드에서 수행)
|
1
2
3
4
5
6
7
8
9
|
# chown oracle:dba /dev/sdb*
# ll /dev/sdb*
brw-rw----. 1 oracle dba 8, 16 Dec 23 10:52 /dev/sdb
brw-rw----. 1 oracle dba 8, 17 Dec 23 10:52 /dev/sdb1
brw-rw----. 1 oracle dba 8, 18 Dec 23 10:52 /dev/sdb2
brw-rw----. 1 oracle dba 8, 19 Dec 23 10:52 /dev/sdb3
brw-rw----. 1 oracle dba 8, 21 Dec 23 10:52 /dev/sdb5
brw-rw----. 1 oracle dba 8, 22 Dec 23 10:52 /dev/sdb6
brw-rw----. 1 oracle dba 8, 23 Dec 23 10:52 /dev/sdb7
|
Temp 파일시스템 할당(모든 노드에서 수행)
|
1
2
|
# vi /etc/fstab
tmpfs /dev/shm tmpfs size=10g 0 0
|
/dev/shm 영역 remount(모든 노드에서 수행)
|
1
2
3
|
# mount -o remount /dev/shm
mount: (hint) your fstab has been modified, but systemd still uses
the old version; use 'systemctl daemon-reload' to reload.
|
추가 후 확인(모든 노드에서 수행)
|
1
2
3
|
# df -h /dev/shm
Filesystem Size Used Avail Use% Mounted on
tmpfs 10G 0 10G 0% /dev/shm
|
asmlib 패키지 설치(모든 노드에서 수행)
|
1
2
3
4
5
6
7
8
9
10
11
12
|
# rpm -ivh oracleasm-support-3.1.1-4.el9.x86_64.rpm
Verifying... ################################# [100%]
Preparing... ################################# [100%]
Updating / installing...
1:oracleasm-support-3.1.1-4.el9 ################################# [100%]
Created symlink /etc/systemd/system/multi-user.target.wants/oracleasm.service → /usr/lib/systemd/system/oracleasm.service.
# rpm -ivh oracleasmlib-3.1.1-1.el9.x86_64.rpm
Verifying... ################################# [100%]
Preparing... ################################# [100%]
Updating / installing...
1:oracleasmlib-3.1.1-1.el9 ################################# [100%]
|
참고 : 아래 링크에서 다운로드 가능
asm support : https://yum.oracle.com/repo/OracleLinux/OL9/addons/x86_64/index.html
asmlib : https://www.oracle.com/linux/downloads/linux-asmlib-v9-downloads.html
Oracle ASM 설정 및 시작(oracle, dba, y, y 순서대로 입력)(모든 노드에서 수행)
|
1
2
3
4
5
6
7
8
9
10
11
12
13
14
15
16
17
18
19
20
21
22
23
|
# oracleasm configure -i
Configuring the Oracle ASM system service.
This will configure the on-boot properties of the Oracle ASM system
service. The following questions will determine whether the service
is started on boot and what permissions it will have. The current
values will be shown in brackets ('[]'). Hitting <ENTER> without
typing an answer will keep that current value. Ctrl-C will abort.
Default user to own the ASM disk devices []: oracle <-- oracle 입력
Default group to own the ASM disk devices []: dba <-- dba 입력
Start Oracle ASM system service on boot (y/n) [y]: y <-- y 입력
Scan for Oracle ASM disks when starting the oracleasm service (y/n) [y]: y <-- y 입력
Maximum number of ASM disks that can be used on system [2048]: <-- 엔터 입력
Enable iofilter if kernel supports it (y/n) [y]: y <-- y 입력
Writing Oracle ASM system service configuration: done
Configuration changes only come into effect after the Oracle ASM
system service is restarted. Please run 'systemctl restart oracleasm'
after making changes.
WARNING: All of your Oracle and ASM instances must be stopped prior
to restarting the oracleasm service.
|
asmlib 활성화 및 상태 확인(모든 노드에서 수행)
|
1
2
3
4
5
6
7
8
9
10
11
|
# systemctl enable --now oracleasm
# oracleasm status
Checking if the oracleasm kernel module is loaded: no (not required with UEK8)
Checking if /dev/oracleasm is mounted: no (not required with UEK8)
Checking which I/O Interface is in use: io_uring (KABI_V3)
Checking if ASMLIB can be loaded: yes
Checking if io_uring is enabled: yes
Checking if io_uring is accessible to the configured DB user: yes
Checking if io_uring supports integrity passthrough: yes
Checking if ASM disks have the correct ownership and permissions: yes
Checking if ASM I/O filter is set up: yes
|
정상임
asm 디스크 라벨링(1번 노드에서 수행)
|
1
2
3
4
5
6
|
#
oracleasm createdisk DATA /dev/sdb1
oracleasm createdisk RECO /dev/sdb2
oracleasm createdisk OCR_VOTE1 /dev/sdb5
oracleasm createdisk OCR_VOTE2 /dev/sdb6
oracleasm createdisk OCR_VOTE3 /dev/sdb7
|
asm 디스크 스캔(모든 노드에서 수행)
|
1
2
3
4
5
|
# oracleasm scandisks
Reloading disk partitions: done
Cleaning any stale ASM disks...
Setting up iofilter map for ASM disks: done
Scanning system for ASM disks...
|
생성 리스트 확인(5개가 나와야 정상)(모든 노드에서 수행)
|
1
2
3
4
5
6
|
# oracleasm listdisks
DATA
OCR_VOTE1
OCR_VOTE2
OCR_VOTE3
RECO
|
2번 노드에서 listdisks시 안나오는 경우 partprobe 명령 입력하여 listdisks 재확인
|
1
2
3
4
5
6
7
8
9
10
11
12
13
14
15
|
# partprobe /dev/sdb
# ls -l /dev/sdb*
brw-rw----. 1 oracle dba 8, 16 Dec 23 12:27 /dev/sdb
brw-rw----. 1 oracle dba 8, 17 Dec 23 12:27 /dev/sdb1
brw-rw----. 1 oracle dba 8, 18 Dec 23 12:27 /dev/sdb2
brw-rw----. 1 oracle dba 8, 19 Dec 23 12:27 /dev/sdb3
brw-rw----. 1 oracle dba 8, 21 Dec 23 12:27 /dev/sdb5
brw-rw----. 1 oracle dba 8, 22 Dec 23 12:27 /dev/sdb6
brw-rw----. 1 oracle dba 8, 23 Dec 23 12:27 /dev/sdb7
# oracleasm listdisks
DATA
OCR_VOTE1
OCR_VOTE2
OCR_VOTE3
RECO
|
2번에서도 잘보임
*/dev/sdb*에 rw 권한이 없으면 chown 660 /dev/sdb* 수행
asm 디스크 라벨링 상세 확인(모든 노드에서 수행)
|
1
2
3
4
5
6
7
8
9
10
11
12
13
14
15
|
# oracleasm querydisk -p DATA
Disk "DATA" is a valid ASM disk
/dev/sdb1: LABEL="DATA" TYPE="oracleasm"
# oracleasm querydisk -p RECO
Disk "RECO" is a valid ASM disk
/dev/sdb2: LABEL="RECO" TYPE="oracleasm"
# oracleasm querydisk -p OCR_VOTE1
Disk "OCR_VOTE1" is a valid ASM disk
/dev/sdb5: LABEL="OCR_VOTE1" TYPE="oracleasm"
# oracleasm querydisk -p OCR_VOTE2
Disk "OCR_VOTE2" is a valid ASM disk
/dev/sdb6: LABEL="OCR_VOTE2" TYPE="oracleasm"
# oracleasm querydisk -p OCR_VOTE3
Disk "OCR_VOTE3" is a valid ASM disk
/dev/sdb7: LABEL="OCR_VOTE3" TYPE="oracleasm"
|
asm 디스크 라벨링 상세 확인2(모든 노드에서 수행)
|
1
2
3
4
5
6
7
8
9
10
|
# oracleasm querydisk /dev/sdb1
Device "/dev/sdb1" is marked as an ASM disk with the label "DATA"
# oracleasm querydisk /dev/sdb2
Device "/dev/sdb2" is marked as an ASM disk with the label "RECO"
# oracleasm querydisk /dev/sdb5
Device "/dev/sdb5" is marked as an ASM disk with the label "OCR_VOTE1"
# oracleasm querydisk /dev/sdb6
Device "/dev/sdb6" is marked as an ASM disk with the label "OCR_VOTE2"
# oracleasm querydisk /dev/sdb7
Device "/dev/sdb7" is marked as an ASM disk with the label "OCR_VOTE3"
|
asm 디스크 라벨링 상세 확인3(모든 노드에서 수행)
|
1
2
3
4
5
6
7
8
9
|
# oracleasm discover
Using ASMLIB from /opt/oracle/extapi/64/asm/orcl/1/libasm.so
[ASM Library - Linux, version 3.1.1 (KABI_V3), 2025-07-24 22:50]
Discovered disk: ORCL:OCR_VOTE1 [8388608 blocks (4294967296 bytes), blksz 512/512, maxio 4194304 bytes, integrity unsupported]
Discovered disk: ORCL:OCR_VOTE2 [8388608 blocks (4294967296 bytes), blksz 512/512, maxio 4194304 bytes, integrity unsupported]
Discovered disk: ORCL:OCR_VOTE3 [8388608 blocks (4294967296 bytes), blksz 512/512, maxio 4194304 bytes, integrity unsupported]
Discovered disk: ORCL:RECO [62914560 blocks (32212254720 bytes), blksz 512/512, maxio 4194304 bytes, integrity unsupported]
Discovered disk: ORCL:DATA [62914560 blocks (32212254720 bytes), blksz 512/512, maxio 4194304 bytes, integrity unsupported]
|
서버에 Oracle Database 설치 미디어 업로드 후 권한 부여(1번 노드에서 수행)
|
1
2
3
4
5
6
7
8
|
$ ls -al /app/media/
total 9868280
drwxrwxr-x. 2 oracle dba 161 Dec 23 12:33 .
drwxrwxr-x. 5 oracle dba 45 Dec 23 11:03 ..
-rwxr-xr-x. 1 oracle dba 3059705302 Dec 23 12:32 LINUX.X64_193000_db_home.zip
-rwxr-xr-x. 1 oracle dba 2889184573 Dec 23 12:33 LINUX.X64_193000_grid_home.zip
-rwxr-xr-x. 1 oracle dba 4083374170 Dec 23 12:33 p37952382_190000_Linux-x86-64.zip
-rwxr-xr-x. 1 oracle dba 72847006 Dec 23 12:33 p6880880_190000_Linux-x86-64.zip
|
오라클 계정 접속 후 .bash_profile 에 아래 내용 추가(모든 노드에서 수행)
*2번노드에는 ORACLE_SID를 ORADB2로 설정
|
1
2
3
4
5
6
7
8
9
10
11
12
13
14
15
16
17
18
19
20
21
|
# su - oracle
$ vi .bash_profile
export ORACLE_BASE=/app/oracle
export ORACLE_HOME=$ORACLE_BASE/product/19c
export GRID_HOME=/app/grid/product/19c
export ORA_INVENTORY=/app/oraInventory
export ORACLE_SID=ORADB1;
export DB_UNIQUE_NAME=ORADB
export PATH=$ORACLE_HOME/bin:$ORACLE_HOME/OPatch:$GRID_HOME/bin:$PATH
export LD_LIBRARY_PATH=$ORACLE_HOME/lib:/lib:/usr/lib
export CLASSPATH=$ORACLE_HOME/jlib:$ORACLE_HOME/rdbms/jlib
export CV_ASSUME_DISTID=OL8
stty erase ^H
alias ss="sqlplus / as sysdba"
alias bdump="cd $ORACLE_BASE/diag/rdbms/${DB_UNIQUE_NAME,,}/$ORACLE_SID/trace"
alias alert='vi $ORACLE_BASE/diag/rdbms/${DB_UNIQUE_NAME,,}/$ORACLE_SID/trace/alert_$ORACLE_SID.log'
alias alertf='tail -300f $ORACLE_BASE/diag/rdbms/${DB_UNIQUE_NAME,,}/$ORACLE_SID/trace/alert_$ORACLE_SID.log'
alias listen="vi $ORACLE_BASE/diag/tnslsnr/$(hostname -s)/listener/trace/listener.log"
alias listenf="tail -300f $ORACLE_BASE/diag/tnslsnr/$(hostname -s)/listener/trace/listener.log"
|
적용(모든 노드에서 수행)
|
1
|
$ . ./.bash_profile
|
Grid Software 설치
grid 설치파일 압축해제(1번 노드에서 수행)
|
1
2
3
|
$ mkdir -p $GRID_HOME
$ cd $GRID_HOME
$ unzip -q /app/media/LINUX.X64_193000_grid_home.zip
|
OPatch 파일 교체(1번 노드에서 수행)
|
1
2
|
$ mv OPatch OPatchold
$ unzip -q /app/media/p6880880_190000_Linux-x86-64
|
OPatch 버전 확인(1번 노드에서 수행)
|
1
2
3
4
5
|
$ cd OPatch
$ ./opatch version -oh $GRID_HOME
OPatch Version: 12.2.0.1.47
OPatch succeeded.
|
패치파일 압축 해제(1번 노드에서 수행)
|
1
2
|
$ cd /app/media
$ unzip -q p37952382_190000_Linux-x86-64.zip
|
cvuqdisk 패키지 설치(root 유저로 수행)(1번 노드에서 수행)
|
1
2
3
4
5
6
7
|
# cd /app/grid/product/19c/cv/rpm
# rpm -ivh cvuqdisk-*.rpm
Verifying... ################################# [100%]
Preparing... ################################# [100%]
Using default group oinstall to install package
Updating / installing...
1:cvuqdisk-1.0.10-1 ################################# [100%]
|
2번 노드로 패키지 전송(1번 노드에서 수행)
|
1
2
3
|
# scp cvuqdisk-1.0.10-1.rpm 192.168.137.20:/root/
root@192.168.137.20's password:
cvuqdisk-1.0.10-1.rpm 100% 11KB 11.7MB/s 00:00
|
2번 노드에서 패키지 설치(2번 노드에서 수행)
|
1
2
3
4
5
6
|
# rpm -ivh cvuqdisk-1.0.10-1.rpm
Verifying... ################################# [100%]
Preparing... ################################# [100%]
Using default group oinstall to install package
Updating / installing...
1:cvuqdisk-1.0.10-1 ################################# [100%]
|
grid 설치(및 패치)(1번 노드에서 수행)
|
1
2
|
$ cd $GRID_HOME
$ ./gridSetup.sh -applyRU /app/media/37952382/37957391
|
참고로 applyRU 패치 로그는 아래 경로에서 확인 가능함(1번 노드에서 수행)
|
1
2
|
$ cd /app/grid/product/19c/cfgtoollogs/opatchauto
$ tail -300f opatchauto_2025-12-20_22-10-55_binary.log
|
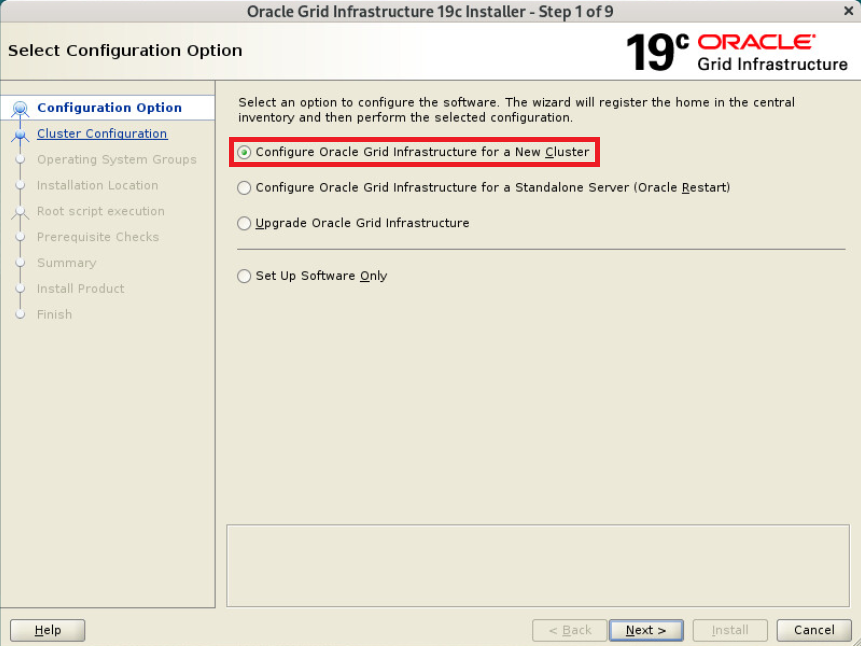
Configure Oracle Grid Infrastructure for a New Cluster 선택
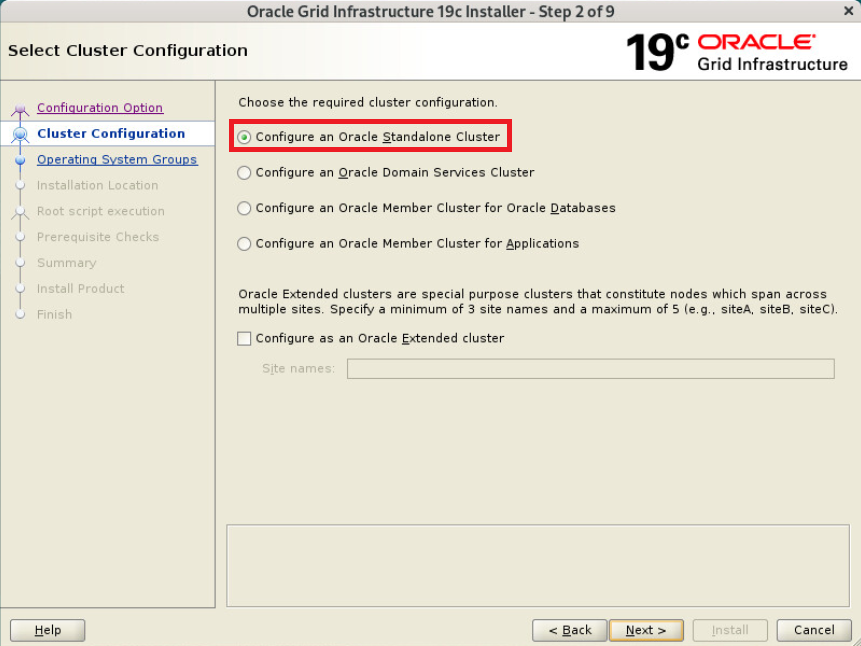
Configure an Oracle Standalone Cluster 선택
SCAN 정보 입력

ADD 선택

2번노드 정보 입력

SSH connectivity 선택, oracle 유저 패스워드 입력 - Setup 선택

ens224는 Public로, ens256은 ASM & Private로 선택

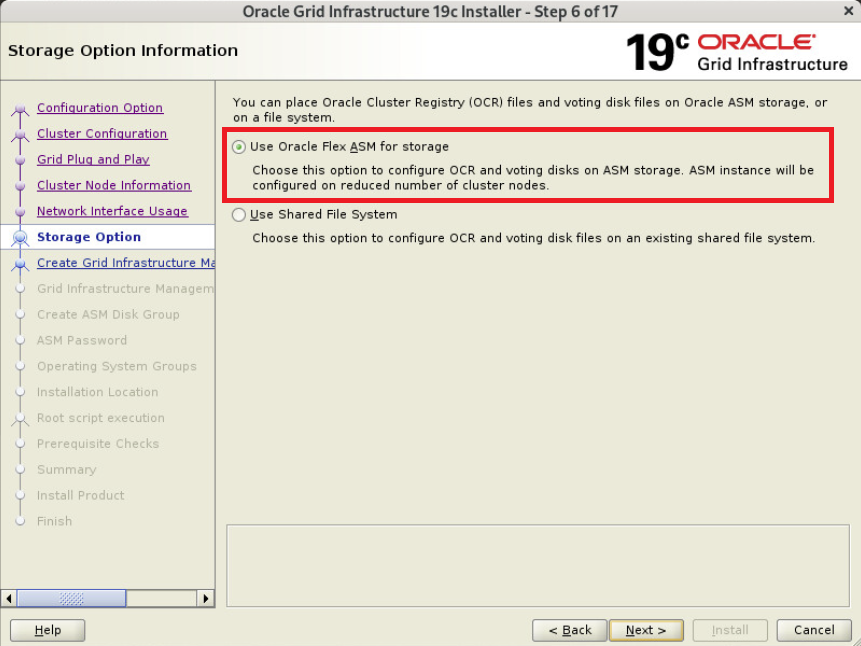
Use Oracle Flex ASM for storage 선택
No 선택

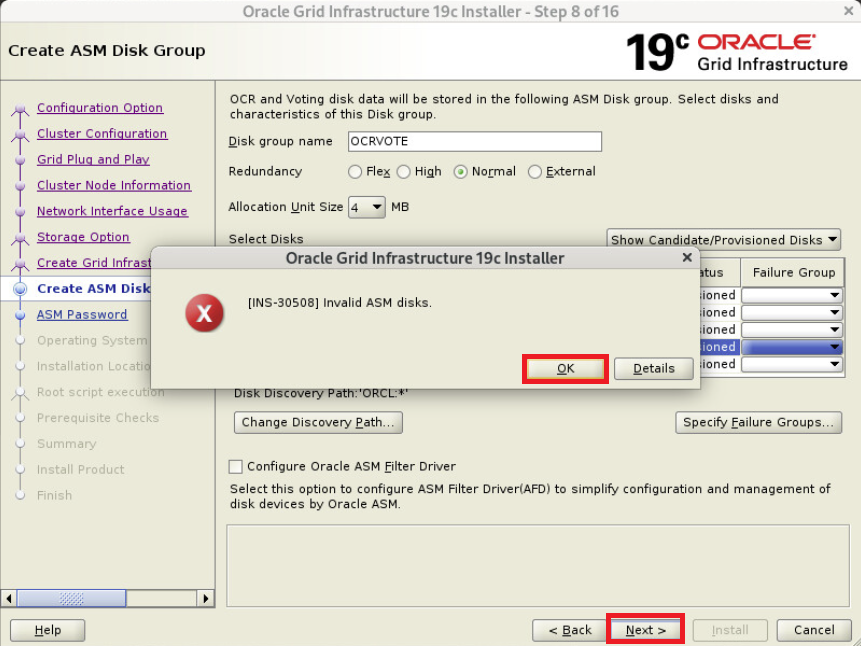
OCRVOTE 입력 후 Normal 선택
Change Discovry Path - ORCL:* 입력

disk 3개 선택 후 Next

gui로 설치 시도시 아래 단계에서 에러 발생함
ORCL:*(ORCL:DATA)로 진행하려 했지만 안됨
next 하면 [INS-30508] Invalid ASM disks. 발생하면서 안됨
이때 확인 누른 뒤 다시 next 누르면 넘어가짐

에러 재발생시 ok - Next 선택하면 정상적으로 넘어가짐
패스워드 oracle 입력

Yes 입력

Do not use IPMI 선택

EM 체크하지 않고 다음

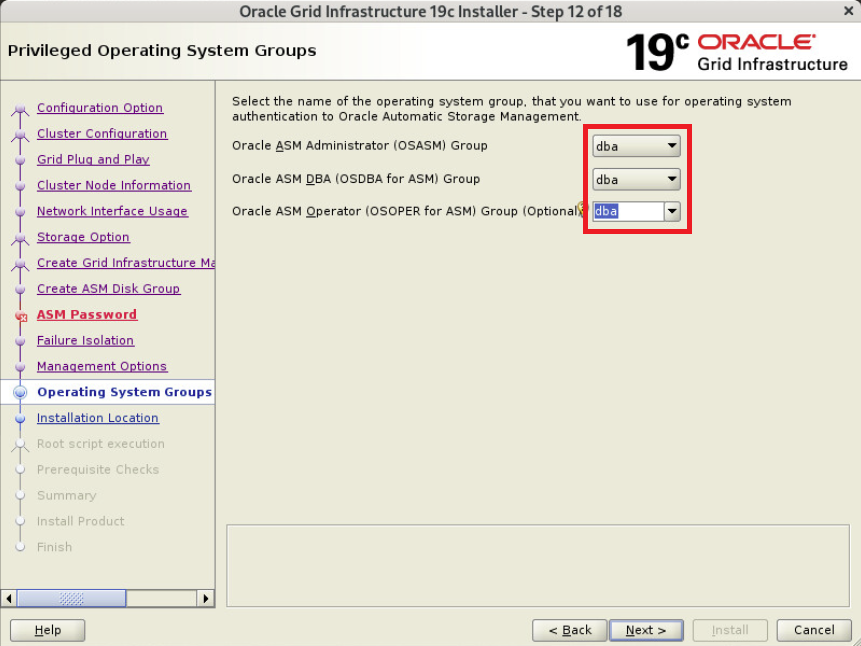
그룹 dba로 선택
YES

oracle base 지정

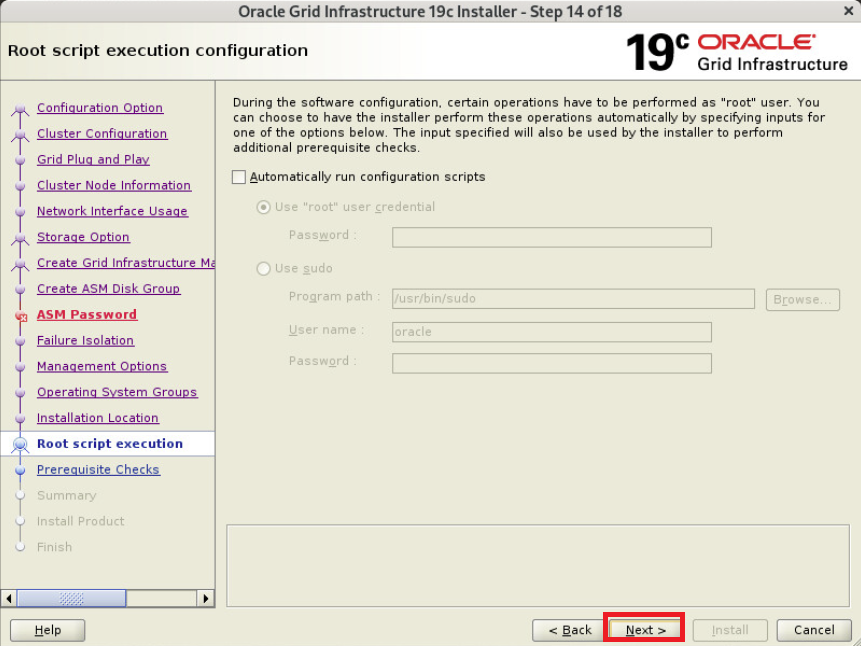
스크립트 자동 수행 필요시 체크(본문에서는 미체크함)
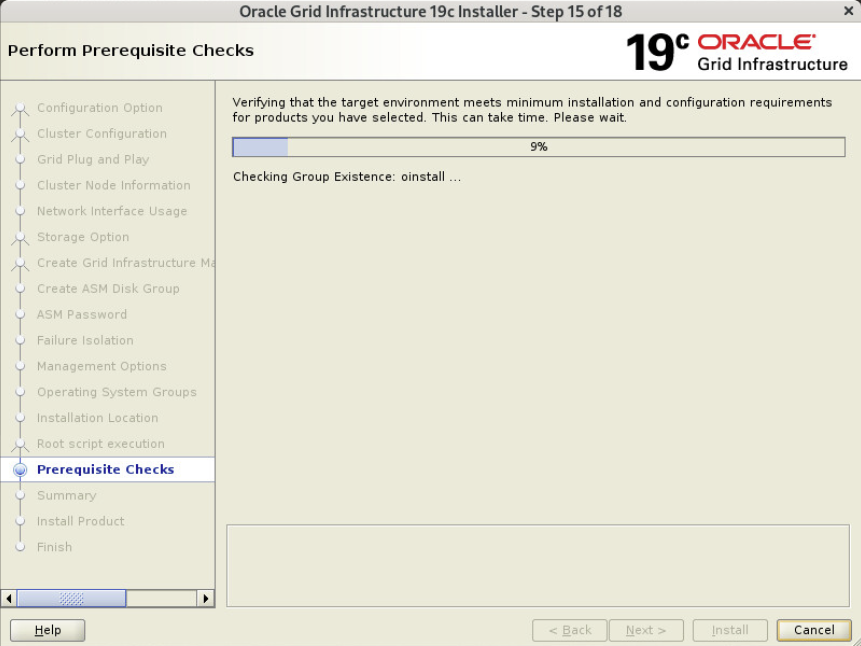
사전 요구사항 체크중
SCAN 관련메세지는 SCAN IP가 DNS에 등록되어 있지 않아서 발생한 문제 모두 Ignore
swap을 8gb로 설정해 경고가 났지만 무시 가능함
물리메모리가 16gb 이하인 경우 메모리랑 동일하게 하면되서 10gb로 설정하면 되지만 본문에서는 하지않음

response 파일이 필요하다면 따로 저장 후 Install

grid 설치중

스크립트 노드별 순차 수행

orainstRoot.sh 각 노드에서 순서대로 수행
|
1
2
3
4
5
6
7
8
9
10
11
12
13
14
15
16
17
|
#1번 노드
# /app/oraInventory/orainstRoot.sh
Changing permissions of /app/oraInventory.
Adding read,write permissions for group.
Removing read,write,execute permissions for world.
Changing groupname of /app/oraInventory to oinstall.
The execution of the script is complete.
#2번 노드
# /app/oraInventory/orainstRoot.sh
Changing permissions of /app/oraInventory.
Adding read,write permissions for group.
Removing read,write,execute permissions for world.
Changing groupname of /app/oraInventory to oinstall.
The execution of the script is complete.
|
root.sh 각 노드에서 순서대로 수행
|
1
2
3
4
5
6
7
8
9
10
11
12
13
14
15
16
17
18
19
20
21
22
23
24
25
26
27
28
29
30
31
32
33
34
35
36
37
38
39
40
41
42
43
44
45
46
47
48
49
50
51
52
53
54
55
56
57
58
59
60
61
62
63
64
65
66
67
68
69
70
71
72
73
74
75
76
77
78
79
80
81
82
83
84
85
86
87
88
89
90
91
92
93
94
95
96
97
98
99
100
101
102
103
104
105
106
107
108
109
110
111
112
113
114
|
#1번 노드
# /app/grid/product/19c/root.sh
Performing root user operation.
The following environment variables are set as:
ORACLE_OWNER= oracle
ORACLE_HOME= /app/grid/product/19c
Enter the full pathname of the local bin directory: [/usr/local/bin]:
Copying dbhome to /usr/local/bin ...
Copying oraenv to /usr/local/bin ...
Copying coraenv to /usr/local/bin ...
Creating /etc/oratab file...
Entries will be added to the /etc/oratab file as needed by
Database Configuration Assistant when a database is created
Finished running generic part of root script.
Now product-specific root actions will be performed.
Relinking oracle with rac_on option
Using configuration parameter file: /app/grid/product/19c/crs/install/crsconfig_params
The log of current session can be found at:
/app/oracle/crsdata/oel19db1/crsconfig/rootcrs_oel19db1_2025-12-23_11-14-17PM.log
2025/12/23 23:14:25 CLSRSC-594: Executing installation step 1 of 19: 'ValidateEnv'.
2025/12/23 23:14:25 CLSRSC-594: Executing installation step 2 of 19: 'CheckFirstNode'.
2025/12/23 23:14:27 CLSRSC-594: Executing installation step 3 of 19: 'GenSiteGUIDs'.
2025/12/23 23:14:28 CLSRSC-594: Executing installation step 4 of 19: 'SetupOSD'.
Redirecting to /bin/systemctl restart rsyslog.service
2025/12/23 23:14:28 CLSRSC-594: Executing installation step 5 of 19: 'CheckCRSConfig'.
2025/12/23 23:14:29 CLSRSC-594: Executing installation step 6 of 19: 'SetupLocalGPNP'.
2025/12/23 23:14:40 CLSRSC-594: Executing installation step 7 of 19: 'CreateRootCert'.
2025/12/23 23:14:45 CLSRSC-594: Executing installation step 8 of 19: 'ConfigOLR'.
2025/12/23 23:15:00 CLSRSC-594: Executing installation step 9 of 19: 'ConfigCHMOS'.
2025/12/23 23:15:01 CLSRSC-594: Executing installation step 10 of 19: 'CreateOHASD'.
2025/12/23 23:15:06 CLSRSC-594: Executing installation step 11 of 19: 'ConfigOHASD'.
2025/12/23 23:15:12 CLSRSC-330: Adding Clusterware entries to file 'oracle-ohasd.service'
2025/12/23 23:15:35 CLSRSC-594: Executing installation step 12 of 19: 'SetupTFA'.
2025/12/23 23:15:35 CLSRSC-594: Executing installation step 13 of 19: 'InstallAFD'.
2025/12/23 23:15:35 CLSRSC-594: Executing installation step 14 of 19: 'InstallACFS'.
2025/12/23 23:15:41 CLSRSC-594: Executing installation step 15 of 19: 'InstallKA'.
2025/12/23 23:15:48 CLSRSC-594: Executing installation step 16 of 19: 'InitConfig'.
ASM has been created and started successfully.
[DBT-30001] Disk groups created successfully. Check /app/oracle/cfgtoollogs/asmca/asmca-251223PM111615.log for details.
2025/12/23 23:17:07 CLSRSC-482: Running command: '/app/grid/product/19c/bin/ocrconfig -upgrade oracle oinstall'
2025/12/23 23:17:15 CLSRSC-4002: Successfully installed Oracle Trace File Analyzer (TFA) Collector.
CRS-4256: Updating the profile
Successful addition of voting disk 2c815c8ea84b4f1bbffb78d7bc5ddc9b.
Successful addition of voting disk 3d7d8420e4454f12bf2d2e0a205e1fc4.
Successful addition of voting disk 0c2d23d37ef54f66bfc73f7f480b7eba.
Successfully replaced voting disk group with +OCRVOTE.
CRS-4256: Updating the profile
CRS-4266: Voting file(s) successfully replaced
## STATE File Universal Id File Name Disk group
-- ----- ----------------- --------- ---------
1. ONLINE 2c815c8ea84b4f1bbffb78d7bc5ddc9b (ORCL:OCR_VOTE1) [OCRVOTE]
2. ONLINE 3d7d8420e4454f12bf2d2e0a205e1fc4 (ORCL:OCR_VOTE2) [OCRVOTE]
3. ONLINE 0c2d23d37ef54f66bfc73f7f480b7eba (ORCL:OCR_VOTE3) [OCRVOTE]
Located 3 voting disk(s).
2025/12/23 23:18:46 CLSRSC-594: Executing installation step 17 of 19: 'StartCluster'.
2025/12/23 23:19:49 CLSRSC-343: Successfully started Oracle Clusterware stack
2025/12/23 23:19:49 CLSRSC-594: Executing installation step 18 of 19: 'ConfigNode'.
2025/12/23 23:20:57 CLSRSC-594: Executing installation step 19 of 19: 'PostConfig'.
2025/12/23 23:21:20 CLSRSC-325: Configure Oracle Grid Infrastructure for a Cluster ... succeeded
#2번 노드
# /app/grid/product/19c/root.sh
Performing root user operation.
The following environment variables are set as:
ORACLE_OWNER= oracle
ORACLE_HOME= /app/grid/product/19c
Enter the full pathname of the local bin directory: [/usr/local/bin]:
Copying dbhome to /usr/local/bin ...
Copying oraenv to /usr/local/bin ...
Copying coraenv to /usr/local/bin ...
Creating /etc/oratab file...
Entries will be added to the /etc/oratab file as needed by
Database Configuration Assistant when a database is created
Finished running generic part of root script.
Now product-specific root actions will be performed.
Relinking oracle with rac_on option
Using configuration parameter file: /app/grid/product/19c/crs/install/crsconfig_params
The log of current session can be found at:
/app/oracle/crsdata/oel19db2/crsconfig/rootcrs_oel19db2_2025-12-23_11-24-12PM.log
2025/12/23 23:24:19 CLSRSC-594: Executing installation step 1 of 19: 'ValidateEnv'.
2025/12/23 23:24:20 CLSRSC-594: Executing installation step 2 of 19: 'CheckFirstNode'.
2025/12/23 23:24:21 CLSRSC-594: Executing installation step 3 of 19: 'GenSiteGUIDs'.
2025/12/23 23:24:21 CLSRSC-594: Executing installation step 4 of 19: 'SetupOSD'.
Redirecting to /bin/systemctl restart rsyslog.service
2025/12/23 23:24:23 CLSRSC-594: Executing installation step 5 of 19: 'CheckCRSConfig'.
2025/12/23 23:24:24 CLSRSC-594: Executing installation step 6 of 19: 'SetupLocalGPNP'.
2025/12/23 23:24:25 CLSRSC-594: Executing installation step 7 of 19: 'CreateRootCert'.
2025/12/23 23:24:25 CLSRSC-594: Executing installation step 8 of 19: 'ConfigOLR'.
2025/12/23 23:24:36 CLSRSC-594: Executing installation step 9 of 19: 'ConfigCHMOS'.
2025/12/23 23:24:36 CLSRSC-594: Executing installation step 10 of 19: 'CreateOHASD'.
2025/12/23 23:24:38 CLSRSC-594: Executing installation step 11 of 19: 'ConfigOHASD'.
2025/12/23 23:24:49 CLSRSC-330: Adding Clusterware entries to file 'oracle-ohasd.service'
2025/12/23 23:25:12 CLSRSC-594: Executing installation step 12 of 19: 'SetupTFA'.
2025/12/23 23:25:12 CLSRSC-594: Executing installation step 13 of 19: 'InstallAFD'.
2025/12/23 23:25:12 CLSRSC-594: Executing installation step 14 of 19: 'InstallACFS'.
2025/12/23 23:25:14 CLSRSC-594: Executing installation step 15 of 19: 'InstallKA'.
2025/12/23 23:25:15 CLSRSC-594: Executing installation step 16 of 19: 'InitConfig'.
2025/12/23 23:25:42 CLSRSC-594: Executing installation step 17 of 19: 'StartCluster'.
2025/12/23 23:26:22 CLSRSC-343: Successfully started Oracle Clusterware stack
2025/12/23 23:26:22 CLSRSC-594: Executing installation step 18 of 19: 'ConfigNode'.
2025/12/23 23:26:57 CLSRSC-594: Executing installation step 19 of 19: 'PostConfig'.
2025/12/23 23:27:24 CLSRSC-325: Configure Oracle Grid Infrastructure for a Cluster ... succeeded
2025/12/23 23:27:36 CLSRSC-4002: Successfully installed Oracle Trace File Analyzer (TFA) Collector.
|
스크립트 모두 수행후 ok 선택
SCAN IP가 DNS에 등록되어 있지 않아서 발생한 문제 무시 해도됨 OK
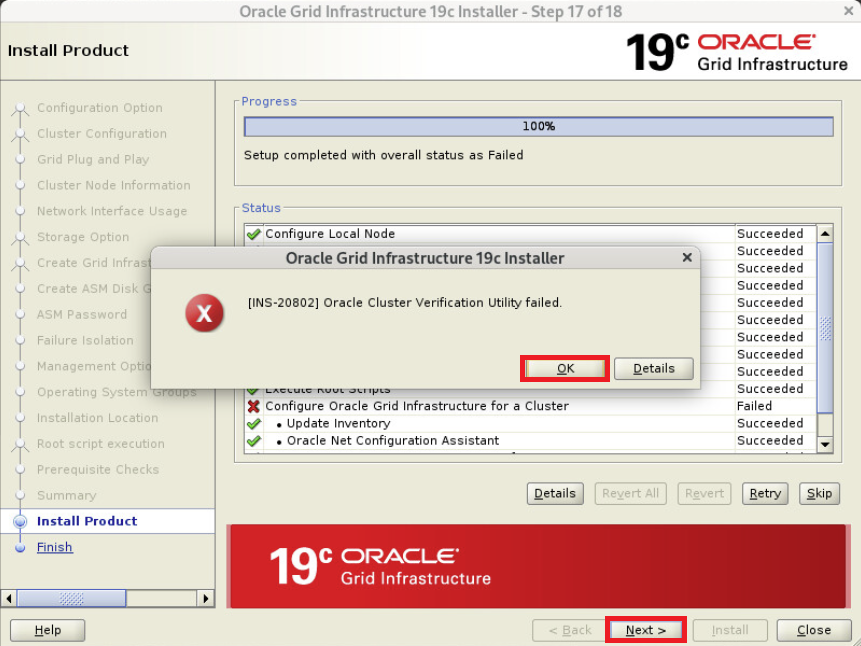
Yes 선택
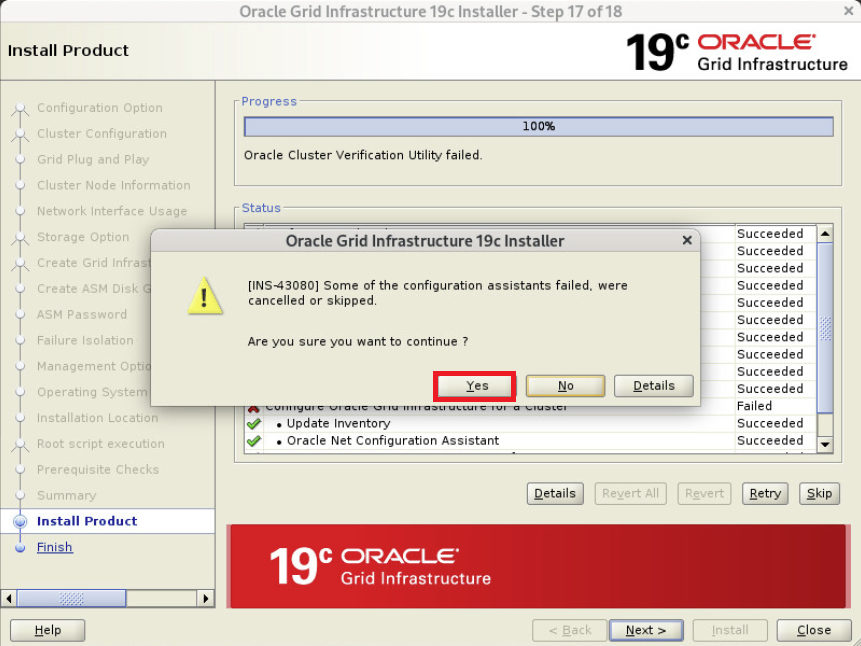
Close 선택

grid 설치 후 점검(모든 노드에서 수행)
|
1
2
3
4
5
6
7
8
9
10
11
12
13
14
15
16
17
18
19
20
21
22
23
24
25
26
27
28
29
30
31
32
33
34
35
36
37
38
39
40
41
42
43
44
45
46
|
$ crsctl stat res -t
--------------------------------------------------------------------------------
Name Target State Server State details
--------------------------------------------------------------------------------
Local Resources
--------------------------------------------------------------------------------
ora.LISTENER.lsnr
ONLINE ONLINE oel19db1 STABLE
ONLINE ONLINE oel19db2 STABLE
ora.chad
ONLINE ONLINE oel19db1 STABLE
ONLINE ONLINE oel19db2 STABLE
ora.net1.network
ONLINE ONLINE oel19db1 STABLE
ONLINE ONLINE oel19db2 STABLE
ora.ons
ONLINE ONLINE oel19db1 STABLE
ONLINE ONLINE oel19db2 STABLE
--------------------------------------------------------------------------------
Cluster Resources
--------------------------------------------------------------------------------
ora.ASMNET1LSNR_ASM.lsnr(ora.asmgroup)
1 ONLINE ONLINE oel19db1 STABLE
2 ONLINE ONLINE oel19db2 STABLE
ora.LISTENER_SCAN1.lsnr
1 ONLINE ONLINE oel19db1 STABLE
ora.OCRVOTE.dg(ora.asmgroup)
1 ONLINE ONLINE oel19db1 STABLE
2 ONLINE ONLINE oel19db2 STABLE
ora.asm(ora.asmgroup)
1 ONLINE ONLINE oel19db1 Started,STABLE
2 ONLINE ONLINE oel19db2 Started,STABLE
ora.asmnet1.asmnetwork(ora.asmgroup)
1 ONLINE ONLINE oel19db1 STABLE
2 ONLINE ONLINE oel19db2 STABLE
ora.cvu
1 ONLINE ONLINE oel19db1 STABLE
ora.oel19db1.vip
1 ONLINE ONLINE oel19db1 STABLE
ora.oel19db2.vip
1 ONLINE ONLINE oel19db2 STABLE
ora.qosmserver
1 ONLINE ONLINE oel19db1 STABLE
ora.scan1.vip
1 ONLINE ONLINE oel19db1 STABLE
--------------------------------------------------------------------------------
|
정상
OCR_VOTE DISK 확인(모든 노드에서 수행)
|
1
2
3
4
5
6
7
8
9
10
11
12
13
14
15
16
17
18
19
20
21
22
23
24
25
26
27
28
29
30
|
$ ocrcheck
Status of Oracle Cluster Registry is as follows :
Version : 4
Total space (kbytes) : 901284
Used space (kbytes) : 83992
Available space (kbytes) : 817292
ID : 2107572551
Device/File Name : +OCRVOTE
Device/File integrity check succeeded
Device/File not configured
Device/File not configured
Device/File not configured
Device/File not configured
Cluster registry integrity check succeeded
Logical corruption check bypassed due to non-privileged user
$ crsctl query css votedisk
## STATE File Universal Id File Name Disk group
-- ----- ----------------- --------- ---------
1. ONLINE 2c815c8ea84b4f1bbffb78d7bc5ddc9b (ORCL:OCR_VOTE1) [OCRVOTE]
2. ONLINE 3d7d8420e4454f12bf2d2e0a205e1fc4 (ORCL:OCR_VOTE2) [OCRVOTE]
3. ONLINE 0c2d23d37ef54f66bfc73f7f480b7eba (ORCL:OCR_VOTE3) [OCRVOTE]
Located 3 voting disk(s).
|
정상
grid 패치정보 확인(모든 노드에서 수행)
|
1
2
3
4
5
6
7
8
|
$ $GRID_HOME/OPatch/opatch lspatches -oh $GRID_HOME
38124772;TOMCAT RELEASE UPDATE 19.0.0.0.0 (38124772)
37962946;OCW RELEASE UPDATE 19.28.0.0.0 (37962946)
37962938;ACFS RELEASE UPDATE 19.28.0.0.0 (37962938)
37960098;Database Release Update : 19.28.0.0.250715 (37960098)
36758186;DBWLM RELEASE UPDATE 19.0.0.0.0 (36758186)
OPatch succeeded.
|
정상
asmca 디스크 그룹 추가
asmca 진행(1번 노드에서 수행)
|
1
|
$ asmca
|
Disk Groups 선택 - Create 선택

Disk Group Name 에 DATA 입력 후 External 선택 후 DATA 디스크 선택

Disk Group Name 에 RECO 입력 후 External 선택 후 RECO 디스크 선택

OCRVOTE와 DATA, RECO 디스크 그룹이 존재하는것을 확인 후 Exit

diskgroup 추가후 확인(1번 노드에서 수행)
|
1
2
3
4
5
6
7
8
9
10
11
12
13
14
15
16
17
18
19
20
21
22
23
24
25
26
27
28
29
30
31
32
33
34
35
36
37
38
39
40
41
42
43
44
45
46
47
48
49
50
51
52
|
$ crsctl stat res -t
--------------------------------------------------------------------------------
Name Target State Server State details
--------------------------------------------------------------------------------
Local Resources
--------------------------------------------------------------------------------
ora.LISTENER.lsnr
ONLINE ONLINE oel19db1 STABLE
ONLINE ONLINE oel19db2 STABLE
ora.chad
ONLINE ONLINE oel19db1 STABLE
ONLINE ONLINE oel19db2 STABLE
ora.net1.network
ONLINE ONLINE oel19db1 STABLE
ONLINE ONLINE oel19db2 STABLE
ora.ons
ONLINE ONLINE oel19db1 STABLE
ONLINE ONLINE oel19db2 STABLE
--------------------------------------------------------------------------------
Cluster Resources
--------------------------------------------------------------------------------
ora.ASMNET1LSNR_ASM.lsnr(ora.asmgroup)
1 ONLINE ONLINE oel19db1 STABLE
2 ONLINE ONLINE oel19db2 STABLE
ora.DATA.dg(ora.asmgroup)
1 ONLINE ONLINE oel19db1 STABLE
2 ONLINE ONLINE oel19db2 STABLE
ora.LISTENER_SCAN1.lsnr
1 ONLINE ONLINE oel19db1 STABLE
ora.OCRVOTE.dg(ora.asmgroup)
1 ONLINE ONLINE oel19db1 STABLE
2 ONLINE ONLINE oel19db2 STABLE
ora.RECO.dg(ora.asmgroup)
1 ONLINE ONLINE oel19db1 STABLE
2 ONLINE ONLINE oel19db2 STABLE
ora.asm(ora.asmgroup)
1 ONLINE ONLINE oel19db1 Started,STABLE
2 ONLINE ONLINE oel19db2 Started,STABLE
ora.asmnet1.asmnetwork(ora.asmgroup)
1 ONLINE ONLINE oel19db1 STABLE
2 ONLINE ONLINE oel19db2 STABLE
ora.cvu
1 ONLINE ONLINE oel19db1 STABLE
ora.oel19db1.vip
1 ONLINE ONLINE oel19db1 STABLE
ora.oel19db2.vip
1 ONLINE ONLINE oel19db2 STABLE
ora.qosmserver
1 ONLINE ONLINE oel19db1 STABLE
ora.scan1.vip
1 ONLINE ONLINE oel19db1 STABLE
--------------------------------------------------------------------------------
|
정상적으로 ora.DATA.dg, ora.RECO.dg가 생성됨
DB 소프트웨어(엔진) 설치
db 설치 미디어 압축 해제(1번 노드에서 수행)
|
1
2
3
|
$ mkdir -p $ORACLE_HOME
$ cd $ORACLE_HOME
$ unzip -q /app/media/LINUX.X64_193000_db_home.zip
|
OPatch 파일 교체(1번 노드에서 수행)
|
1
2
|
$ mv OPatch OPatchold
$ unzip -q /app/media/p6880880_190000_Linux-x86-64
|
OPatch 버전 확인(1번 노드에서 수행)
|
1
2
3
4
5
|
$ cd OPatch
$ ./opatch version -oh $ORACLE_HOME
OPatch Version: 12.2.0.1.47
OPatch succeeded.
|
runinstaller 실행(1번 노드에서 수행)
|
1
2
3
4
5
6
|
$ cd $ORACLE_HOME
$ ./runInstaller -applyRU /app/media/37952382/37957391/
Preparing the home to patch...
Applying the patch /app/media/37952382/37957391/...
Successfully applied the patch.
(자동으로 패치 적용 후 GUI 창이 나타남)
|
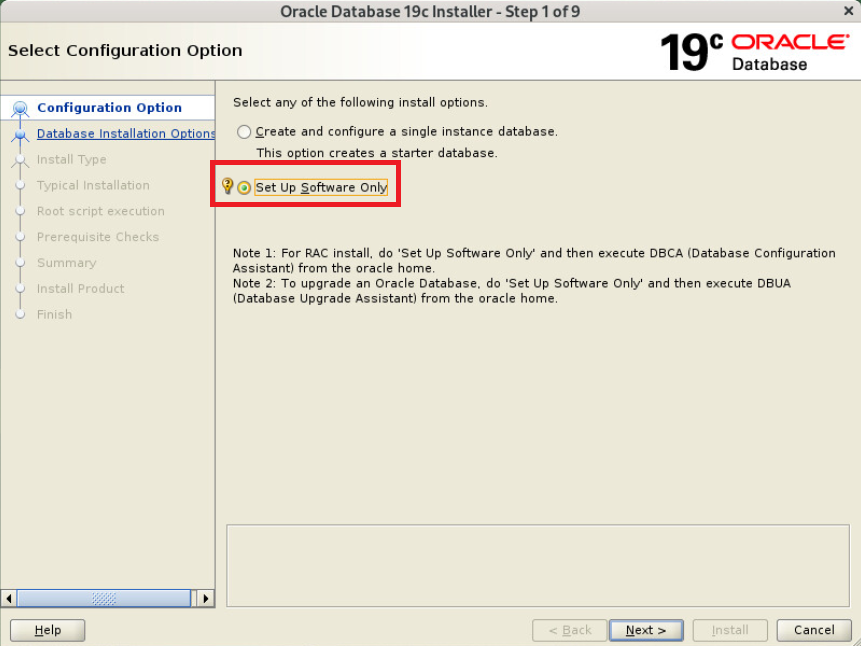
gui가 로딩되기까지 시간이 조금 걸림
Set Up Software Only 선택
Oracle Real Application Cluster database installation 선택

노드 선택

Enterprise Edition 선택

oracle base 지정

group 는 모두 dba 로 지정

설치 중 root 권한으로 스크립트 실행하는 부분에서 자동로 스크립트 실행할지 여부 지정(본문에서는 체크 안함)

사전 요구사항 체크중
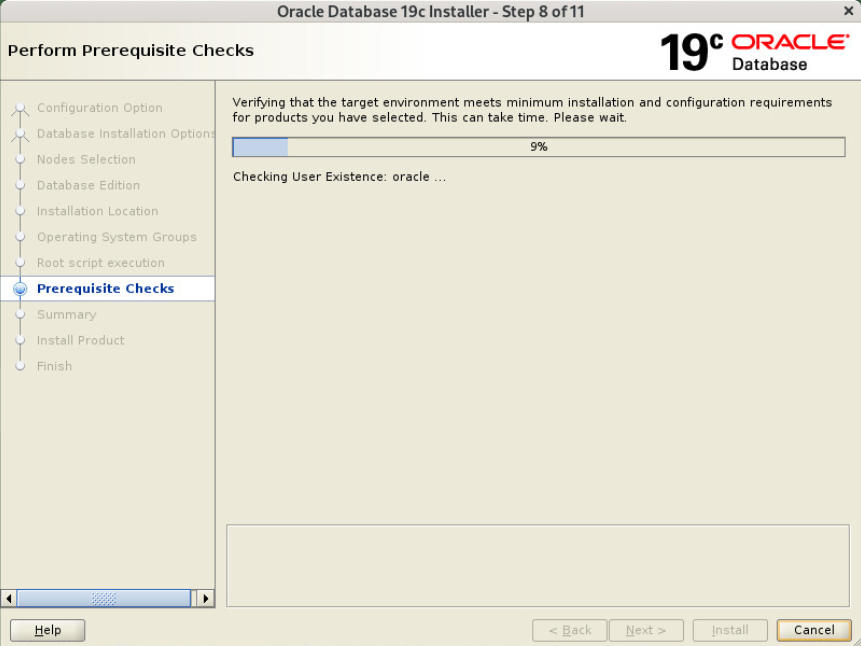
SCAN 관련메세지는 SCAN IP가 DNS에 등록되어 있지 않아서 발생한 문제 모두 Ignore

response 파일이 필요하다면 따로 저장 후 Install

db 엔진 설치중

스크립트 노드별로 수행 후 ok

root.sh 수행(모든 노드에서 수행)
|
1
2
3
4
5
6
7
8
9
10
11
12
13
14
15
16
17
18
19
20
21
22
23
24
25
26
27
28
29
30
31
32
33
|
#1번 노드
# /app/oracle/product/19c/root.sh Performing root user operation.
The following environment variables are set as:
ORACLE_OWNER= oracle
ORACLE_HOME= /app/oracle/product/19c
Enter the full pathname of the local bin directory: [/usr/local/bin]:
The contents of "dbhome" have not changed. No need to overwrite.
The contents of "oraenv" have not changed. No need to overwrite.
The contents of "coraenv" have not changed. No need to overwrite.
Entries will be added to the /etc/oratab file as needed by
Database Configuration Assistant when a database is created
Finished running generic part of root script.
Now product-specific root actions will be performed.
#2번 노드 # /app/oracle/product/19c/root.sh
Performing root user operation.
The following environment variables are set as:
ORACLE_OWNER= oracle
ORACLE_HOME= /app/oracle/product/19c
Enter the full pathname of the local bin directory: [/usr/local/bin]:
The contents of "dbhome" have not changed. No need to overwrite.
The contents of "oraenv" have not changed. No need to overwrite.
The contents of "coraenv" have not changed. No need to overwrite.
Entries will be added to the /etc/oratab file as needed by
Database Configuration Assistant when a database is created
Finished running generic part of root script.
Now product-specific root actions will be performed.
|
수행후 ok
Close

db 엔진 설치 완료
OJVM 패치(모든 노드에서 수행)
|
1
2
3
4
5
6
7
8
9
10
11
12
13
14
15
16
17
18
19
20
21
22
23
24
25
26
27
28
29
30
31
32
33
34
35
36
37
38
39
40
41
42
43
44
|
$ cd /app/media/37952382/37847857/
$ opatch apply -oh $ORACLE_HOME
Oracle Interim Patch Installer version 12.2.0.1.47
Copyright (c) 2025, Oracle Corporation. All rights reserved.
Oracle Home : /app/oracle/product/19c
Central Inventory : /app/oraInventory
from : /app/oracle/product/19c/oraInst.loc
OPatch version : 12.2.0.1.47
OUI version : 12.2.0.7.0
Log file location : /app/oracle/product/19c/cfgtoollogs/opatch/opatch2025-12-25_15-31-46PM_1.log
Verifying environment and performing prerequisite checks...
OPatch continues with these patches: 37847857
Do you want to proceed? [y|n]
y <<-- y 입력
User Responded with: Y
All checks passed.
Please shutdown Oracle instances running out of this ORACLE_HOME on the local system.
(Oracle Home = '/app/oracle/product/19c')
Is the local system ready for patching? [y|n]
y <<-- y 입력
User Responded with: Y
Backing up files...
Applying interim patch '37847857' to OH '/app/oracle/product/19c'
Patching component oracle.javavm.server, 19.0.0.0.0...
Patching component oracle.javavm.server.core, 19.0.0.0.0...
Patching component oracle.rdbms.dbscripts, 19.0.0.0.0...
Patching component oracle.rdbms, 19.0.0.0.0...
Patching component oracle.javavm.client, 19.0.0.0.0...
Patch 37847857 successfully applied.
Log file location: /app/oracle/product/19c/cfgtoollogs/opatch/opatch2025-12-25_15-31-46PM_1.log
OPatch succeeded.
|
DB 패치정보 확인(모든 노드에서 수행)
|
1
2
3
4
5
6
|
$ $ORACLE_HOME/OPatch/opatch lspatches -oh $ORACLE_HOME
37847857;OJVM RELEASE UPDATE: 19.28.0.0.250715 (37847857)
37962946;OCW RELEASE UPDATE 19.28.0.0.0 (37962946)
37960098;Database Release Update : 19.28.0.0.250715 (37960098)
OPatch succeeded.
|
정상적으로 패치됨
DB 생성
dbca 진행(1번 노드에서 수행)
|
1
2
|
# su - oracle
$ dbca
|
Create a database 선택

Advanced configuration 선택

Database Type : Single, Custom Database 선택

노드 선택

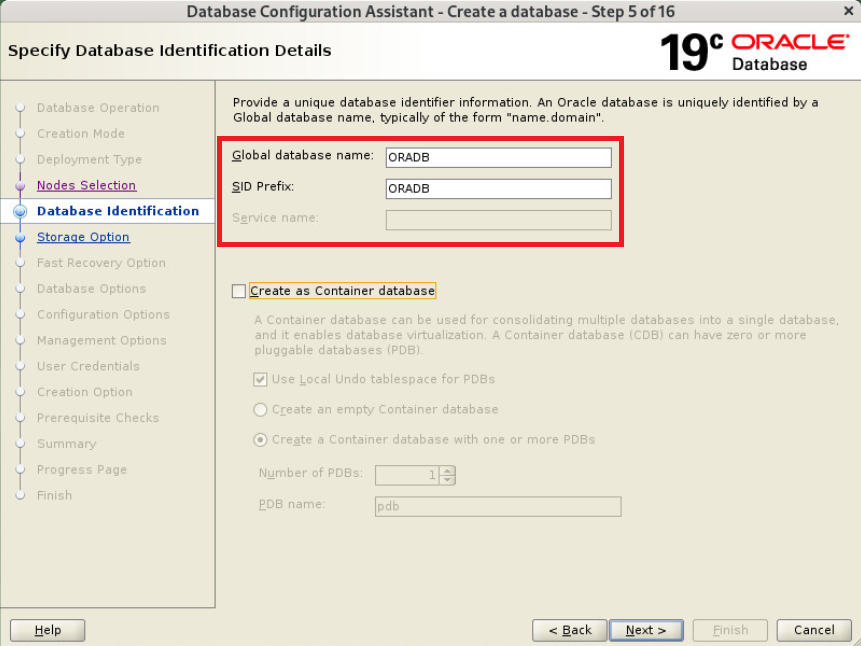
SID 입력
데이터 저장영역 선택 +DATA

FRA, 아카이브 사용하지 않음

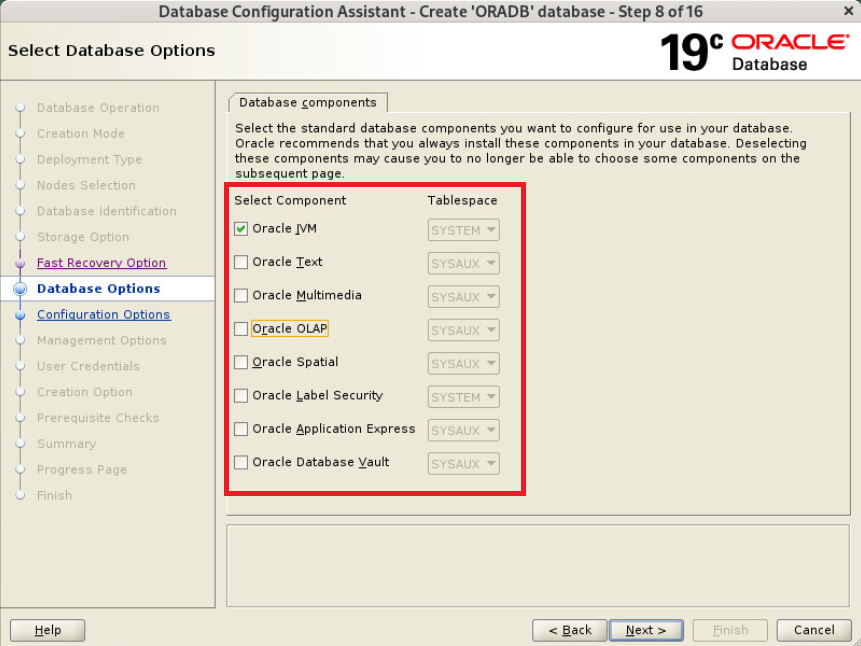
componets 필요시 선택 후 Next
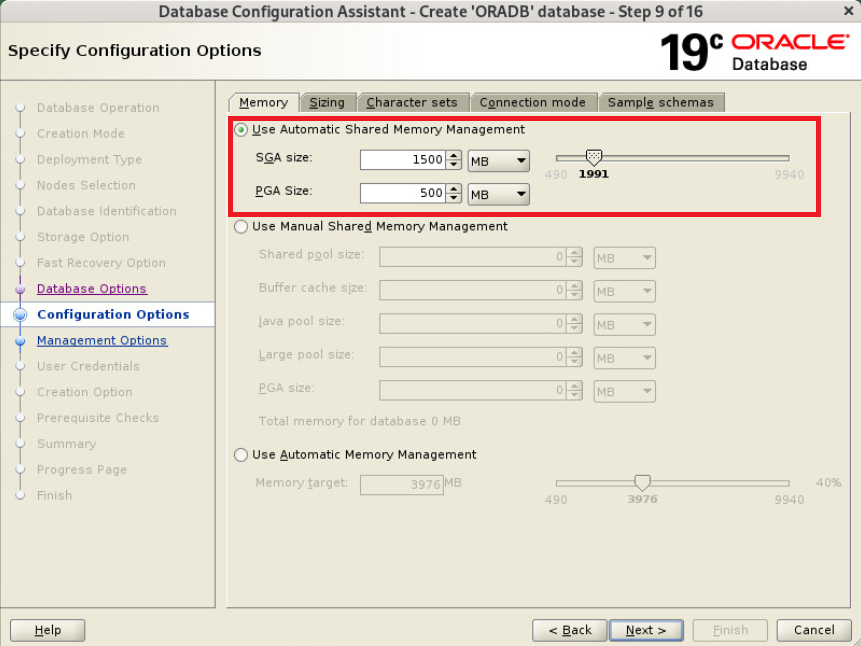
메모리 설정
Character sets - Choose from the list of chracter sets - KO16MSWIN949 선택

체크 해제 후 Next

패스워드 입력

Yes

Create database 선택 후 Next

사전 요구사항 체크중

Scan Ignore 선택

Yes

Finish

설치중

설치 완료됨

grid 상태 확인
|
1
2
3
4
5
6
7
8
9
10
11
12
13
14
15
16
17
18
19
20
21
22
23
24
25
26
27
28
29
30
31
32
33
34
35
36
37
38
39
40
41
42
43
44
45
46
47
48
49
50
51
52
53
54
55
56
57
|
$ crsctl stat res -t
--------------------------------------------------------------------------------
Name Target State Server State details
--------------------------------------------------------------------------------
Local Resources
--------------------------------------------------------------------------------
ora.LISTENER.lsnr
ONLINE ONLINE oel19db1 STABLE
ONLINE ONLINE oel19db2 STABLE
ora.chad
ONLINE ONLINE oel19db1 STABLE
ONLINE ONLINE oel19db2 STABLE
ora.net1.network
ONLINE ONLINE oel19db1 STABLE
ONLINE ONLINE oel19db2 STABLE
ora.ons
ONLINE ONLINE oel19db1 STABLE
ONLINE ONLINE oel19db2 STABLE
--------------------------------------------------------------------------------
Cluster Resources
--------------------------------------------------------------------------------
ora.ASMNET1LSNR_ASM.lsnr(ora.asmgroup)
1 ONLINE ONLINE oel19db1 STABLE
2 ONLINE ONLINE oel19db2 STABLE
ora.DATA.dg(ora.asmgroup)
1 ONLINE ONLINE oel19db1 STABLE
2 ONLINE ONLINE oel19db2 STABLE
ora.LISTENER_SCAN1.lsnr
1 ONLINE ONLINE oel19db1 STABLE
ora.OCRVOTE.dg(ora.asmgroup)
1 ONLINE ONLINE oel19db1 STABLE
2 ONLINE ONLINE oel19db2 STABLE
ora.RECO.dg(ora.asmgroup)
1 ONLINE ONLINE oel19db1 STABLE
2 ONLINE ONLINE oel19db2 STABLE
ora.asm(ora.asmgroup)
1 ONLINE ONLINE oel19db1 Started,STABLE
2 ONLINE ONLINE oel19db2 Started,STABLE
ora.asmnet1.asmnetwork(ora.asmgroup)
1 ONLINE ONLINE oel19db1 STABLE
2 ONLINE ONLINE oel19db2 STABLE
ora.cvu
1 ONLINE ONLINE oel19db1 STABLE
ora.oel19db1.vip
1 ONLINE ONLINE oel19db1 STABLE
ora.oel19db2.vip
1 ONLINE ONLINE oel19db2 STABLE
ora.oradb.db
1 ONLINE ONLINE oel19db1 Open,HOME=/app/oracl
e/product/19c,STABLE
2 ONLINE ONLINE oel19db2 Open,HOME=/app/oracl
e/product/19c,STABLE
ora.qosmserver
1 ONLINE ONLINE oel19db1 STABLE
ora.scan1.vip
1 ONLINE ONLINE oel19db1 STABLE
--------------------------------------------------------------------------------
|
정상
리스너 상태 확인
|
1
2
3
4
5
6
7
8
9
10
11
12
13
14
15
16
17
18
19
20
21
22
23
24
25
26
27
28
29
30
31
32
33
34
35
36
|
$ lsnrctl status
LSNRCTL for Linux: Version 19.0.0.0.0 - Production on 25-DEC-2025 11:00:41
Copyright (c) 1991, 2025, Oracle. All rights reserved.
Connecting to (ADDRESS=(PROTOCOL=tcp)(HOST=)(PORT=1521))
STATUS of the LISTENER
------------------------
Alias LISTENER
Version TNSLSNR for Linux: Version 19.0.0.0.0 - Production
Start Date 25-DEC-2025 23:21:11
Uptime 0 days 11 hr. 39 min. 30 sec
Trace Level off
Security ON: Local OS Authentication
SNMP OFF
Listener Parameter File /app/grid/product/19c/network/admin/listener.ora
Listener Log File /app/oracle/diag/tnslsnr/oel19db1/listener/alert/log.xml
Listening Endpoints Summary...
(DESCRIPTION=(ADDRESS=(PROTOCOL=ipc)(KEY=LISTENER)))
(DESCRIPTION=(ADDRESS=(PROTOCOL=tcp)(HOST=192.168.137.10)(PORT=1521)))
(DESCRIPTION=(ADDRESS=(PROTOCOL=tcp)(HOST=192.168.137.100)(PORT=1521)))
Services Summary...
Service "+ASM" has 1 instance(s).
Instance "+ASM1", status READY, has 1 handler(s) for this service...
Service "+ASM_DATA" has 1 instance(s).
Instance "+ASM1", status READY, has 1 handler(s) for this service...
Service "+ASM_OCRVOTE" has 1 instance(s).
Instance "+ASM1", status READY, has 1 handler(s) for this service...
Service "+ASM_RECO" has 1 instance(s).
Instance "+ASM1", status READY, has 1 handler(s) for this service...
Service "ORADB" has 1 instance(s).
Instance "ORADB1", status READY, has 1 handler(s) for this service...
Service "ORADBXDB" has 1 instance(s).
Instance "ORADB1", status READY, has 1 handler(s) for this service...
The command completed successfully
|
정상
srvctl으로 상태 확인
|
1
2
3
4
5
6
7
8
9
10
11
12
13
14
15
16
17
18
19
20
21
22
23
24
25
26
27
28
29
|
$ srvctl config database -d ORADB
Database unique name: ORADB
Database name: ORADB
Oracle home: /app/oracle/product/19c
Oracle user: oracle
Spfile: +DATA/ORADB/PARAMETERFILE/spfile.268.1220698623
Password file: +DATA/ORADB/PASSWORD/pwdoradb.256.1220697131
Domain:
Start options: open
Stop options: immediate
Database role: PRIMARY
Management policy: AUTOMATIC
Server pools:
Disk Groups: DATA
Mount point paths:
Services:
Type: RAC
Start concurrency:
Stop concurrency:
OSDBA group: dba
OSOPER group: dba
Database instances: ORADB1,ORADB2
Configured nodes: oel19db1,oel19db2
CSS critical: no
CPU count: 0
Memory target: 0
Maximum memory: 0
Default network number for database services:
Database is administrator managed
|
db 상태 확인
|
1
2
3
4
5
6
7
|
$ sqlplus / as sysdba
SQL> select instance_name, version, status from gv$instance;
INSTANCE_NAME VERSION STATUS
---------------- ----------------- ------------
ORADB1 19.0.0.0.0 OPEN
ORADB2 19.0.0.0.0 OPEN
|
정상임
결론 :
리눅스 9 버전에서 asmlib 버전3을 이용해서 오라클 RAC를 설치해보았음
asmlib3 버전부터는 oracleasm createdisk 명령을 수행해도 /dev/oracleasm에 파일이 생기지 않음, 대신 /dev/disk/by-label에 생기는데 이부분을 참고해서 설치해야함
2번 노드에서 oracleasm listdisk시 바로 디스크가 안보이는 경우 partprobe 명령을 수행해줘야 제대로 보였음
그리고 gridSetup gui에서 diskgroup 생성 부분에서 에러가 발생하지만 이부분에서 next를 다시 누르면 넘어가졌음
이부분은 버그일수도 있지만 관련된 정확한 문서는 찾지 못했음
참조 :
Bug 35578393 - Warnings During Oracle Gateway pg4appc after 19c(19.19) install on ol9 (Doc ID 35578393.8)
19c regular client installation on OL9/RHEL9 using Silent method aborted after relink error "Error in invoking target 'client_sharedlib' of makefile '$ORACLE_HOME/rdbms/lib/ins_rdbms.mk'" (Doc ID 3008635.1)
Requirements for Installing Oracle Database/Client 19c (19.22 or higher) on OL9 or RHEL9 64-bit (x86-64) (Doc ID 2982833.1)
19.x: ./runInstaller failed with " PRVF-7532 : Package "compat-libcap1" is missing on node "(HOSTNAME)" " on OL9/RHEL9 (Doc ID 3018358.1)
19c Database Installation/relink fails with :"Error in invoking target 'libasmclntsh19.ohso libasmperl19.ohso client_sharedlib' of makefile ins_rdbms.mk " (Doc ID 2760289.1)
Primary Note of Linux OS Requirements for Database Server (Doc ID 851598.1)
OL9:ORA-15186: ASMLIB Error Function = [asm_init] [io_uring not permitted for this process] (Doc ID 3108578.1)
ASM and Database Services Not Starting After 19.27 RU Patching (STANDALONE) (Doc ID 3092401.1)
CVU Report PRVE-3155 error (Doc ID 2630514.1)
Wrong DiscoveryString /dev/*: rootupgrade.sh/root.sh hangs (Doc ID 1916106.1)
https://docs.oracle.com/en/database/oracle/oracle-database/19/cwlin/supported-oracle-linux-9-distributions-for-x86-64.html
https://docs.oracle.com/en/database/oracle/oracle-database/19/ladbi/supported-oracle-linux-9-distributions-for-x86-64.html
https://yum.oracle.com/repo/OracleLinux/OL9/addons/x86_64/index.html
https://www.oracle.com/linux/downloads/linux-asmlib-v9-downloads.html
https://docs.oracle.com/en/operating-systems/oracle-linux/asmlib/
https://dataforum.io/pages/viewpage.action?pageId=5734410
https://dev.to/vahidusefzadeh/installing-oracle-grid-infrastructure-1925-on-oracle-linux-95-using-asmlib-3-4bki
https://blog.purestorage.com/purely-technical/installation-configuration-oracle-asmlib-v3-1-on-oracle-linux-9/
https://positivemh.tistory.com/765
https://positivemh.tistory.com/175
https://positivemh.tistory.com/762
https://positivemh.tistory.com/763
https://positivemh.tistory.com/764
https://positivemh.tistory.com/765
https://positivemh.tistory.com/1321
'ORACLE > Install' 카테고리의 다른 글
| Oracle Linux 9.6에 Oracle 26ai 설치 가이드 (2) | 2026.01.30 |
|---|---|
| 오라클 19c grid 골드 이미지 생성 및 배포 가이드 (0) | 2026.01.19 |
| Oracle Linux 9.6에 Oracle 19c Restart 설치 가이드 (0) | 2025.12.31 |
| 오라클 26ai 23.26 골드이미지 패치 가이드 (0) | 2025.10.15 |
| 오라클 19c opatch시 silent 옵션 (0) | 2025.09.24 |