
OS환경 : Oracle Linux 8.4 (64bit)
DB 환경 : Oracle Database 19.12.0.0
방법 : Oracle Linux 8.4에 Oracle 19c RAC 설치 가이드_Part 1
OS 설치는 아래 게시물 참조
Oracle Linux 8.4 설치 가이드(https://positivemh.tistory.com/761)
hostname 변경해야함
1번 노드 hostname : oel19db1
2번 노드 hostname : oel19db2
*본문에 2번노드 표시가 없으면 모두 1번노드에서 작업
설치파일은 아래 4가지 파일을 이용함
GRID : LINUX.X64_193000_grid_home.zip
DB : LINUX.X64_193000_db_home.zip
OPatch : p6880880_190000_Linux-x86-64.zip(12.2.0.1.27)
RU : p32900083_190000_Linux-x86-64.zip
Patch 32900083 - Combo of OJVM Component Release Update 19.12.0.0.210720 + Grid Infrastructure Jul 2021 Release Update 19.12.0.0.210720
ㄴ Patch 32895426 - Database Grid Infrastructure Jul 2021 Release Update 19.12.0.0.210720
ㄴ Patch 32876380 - Oracle JavaVM Component Release Update 19.12.0.0.210720
하드웨어 설정
Oracle Linux 8.4 설치 가이드를 보고 설치한 경우
OEL8.4 폴더에 설치했을텐데
19c_rac라는 폴더를 하나 만들어서 그안에 폴더를 통째로 이동시켜줌
OEL8.4 폴더는 oel19db1로 폴더명을 변경시켜줌
19c_rac 폴더에 아래와 같이 storage 라는 폴더도 생성해줌(공유 경로로 사용예정)

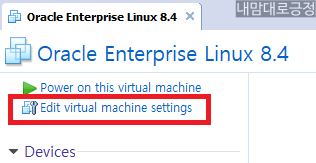
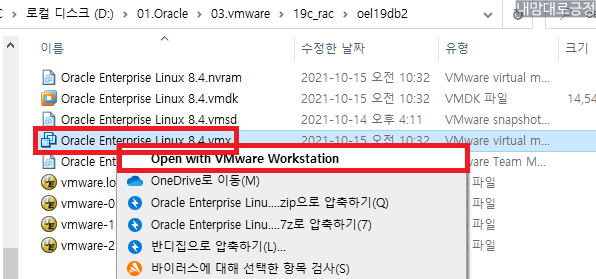
.vmx파일을 실행하면 vmware가 실행됨

Edit virtual machine settings 선택
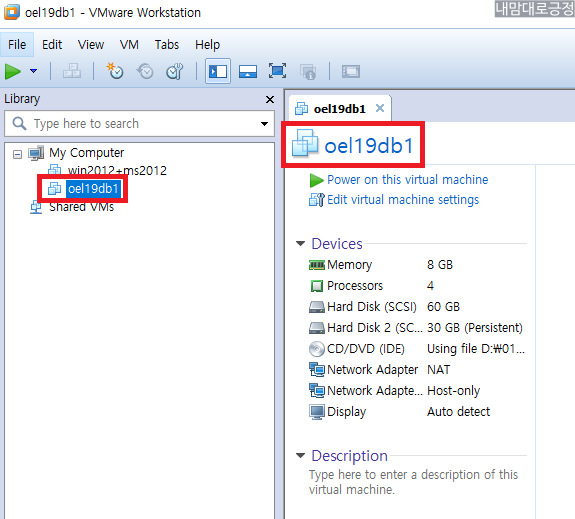
메모리 8gb로 수정(4gb도 가능)

Processors 2, 2로 변경(1, 1도 가능)
Add 선택

SCSI 선택

Create a new virtual disk 선택

30GB 입력 후 Store virtual disk as a single file 선택

추가 디스크 위치 선택
storage 폴더에 생성(공유경로로 사용예정)

추가된 디스크 선택 후 Advanced 선택

SCSI 1:0 으로 선택 후 OK

네트워크 어댑터 추가를 위해 Add

Network Adapter 선택

Host_only 선택

디스크와 네트워크 추가된 모습 확인 후 OK

현재 vmware(Oracle Enterprise Linux 8.4)를 우클릭 - Rename

oel19db1로 변경
vmware 프로그램 종료 후 D:\01.Oracle\03.vmware\19c_rac\oel19db1\Oracle Enterprise Linux 8.4.vmx 메모장으로 열기
제일 밑에 아래 내용 추가 후 저장
|
1
2
3
4
|
disk.locking = "FALSE"
diskLib.dataCacheMaxSize = "0"
scsi1.sharedBus = "virtual"
scsi1:0.deviceType = "disk"
|
OS 기동, 기동 시 아래 메세지 발생 시 I copied it 선택

OS 설정
노드1 OS 기동 후
/etc/hostname 확인
|
1
2
|
# cat /etc/hostname
oel19db1
|
기존에 다른 hostname이라면 hostname 변경 후 재기동
|
1
2
|
# hostnamectl set-hostname oel19db1
# reboot
|
Network 설정
|
1
2
3
4
5
6
7
8
9
10
|
Public network(ens32)
IP/Netmask/GW
192.168.137.10/255.255.255.0/192.168.137.2 --노드1
192.168.137.20/255.255.255.0/192.168.137.2 --노드2
DNS 168.126.63.1
Private network
IP/Netmask/GW(ens34)
10.10.10.10/255.255.255.0 --노드1
10.10.10.20/255.255.255.0 --노드2
|
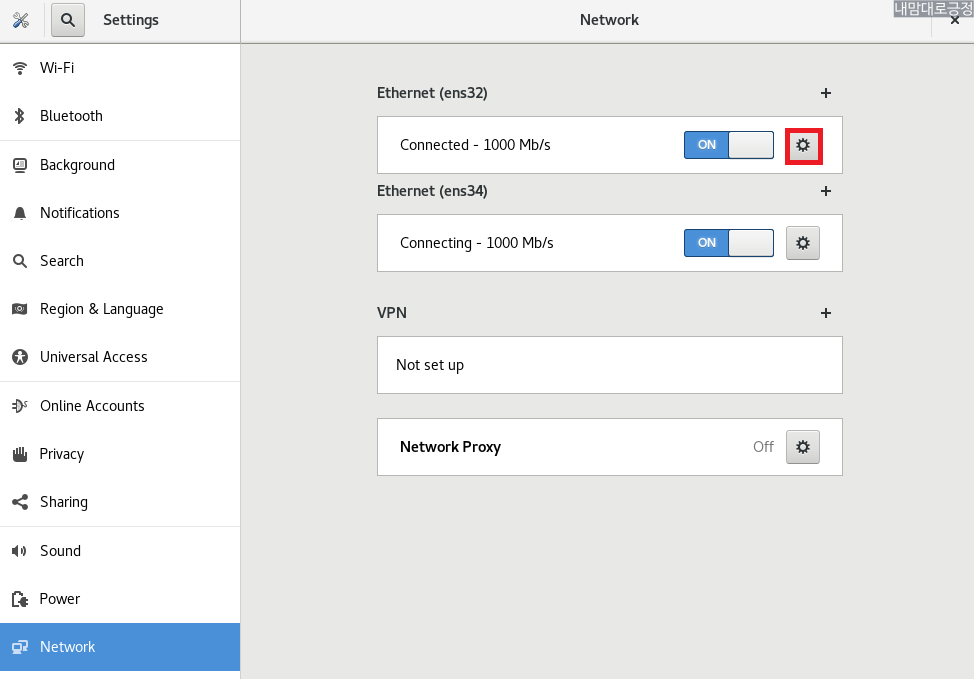
Network 설정(GUI)
OS 기동 후 root 유저 접속 후 우측 상단 전원버튼 선택 후 설정 버튼 선택

ens32의 설정버튼 선택
IPv4로 이동

Address를 192.168.137.10으로 변경 후 Apply

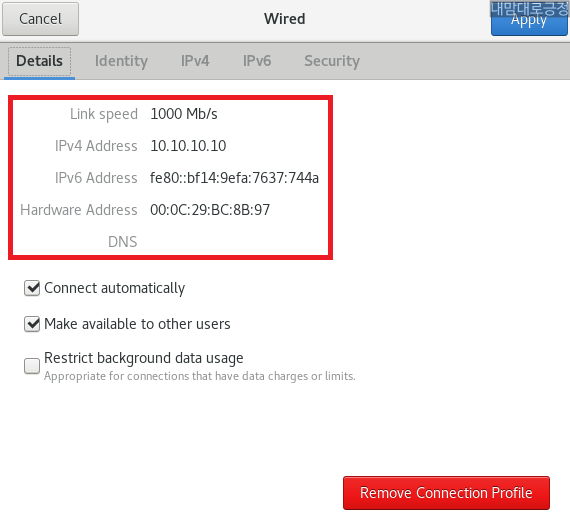
ens34 설정 선택

Connect automatically, Make available to other users 선택 후 IPv4 선택
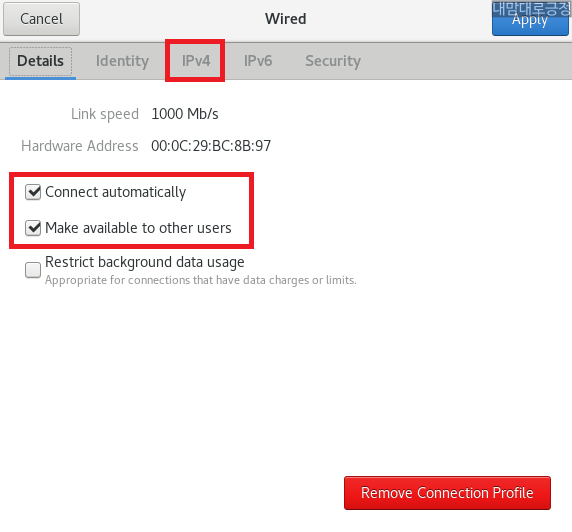
Manual 선택 후 Address/Netmask를 10.10.10.10/24 설정 후 Apply

ens32, ens34 모두 OFF

ens32, ens34 모두 ON 후 각 설정 확인

IP가 정상적으로 변경되어있음

IP가 정상적으로 변경되어있음
네트워크 설정 후 확인
|
1
2
3
4
5
6
7
8
9
10
11
12
13
14
15
16
17
18
19
20
21
22
23
24
25
26
27
28
29
30
31
32
33
34
35
|
# ifconfig
ens32: flags=4163<UP,BROADCAST,RUNNING,MULTICAST> mtu 1500
inet 192.168.137.10 netmask 255.255.255.0 broadcast 192.168.137.255
inet6 fe80::20c:29ff:febc:8b8d prefixlen 64 scopeid 0x20<link>
ether 00:0c:29:bc:8b:8d txqueuelen 1000 (Ethernet)
RX packets 86 bytes 17444 (17.0 KiB)
RX errors 0 dropped 0 overruns 0 frame 0
TX packets 119 bytes 16141 (15.7 KiB)
TX errors 0 dropped 0 overruns 0 carrier 0 collisions 0
ens34: flags=4163<UP,BROADCAST,RUNNING,MULTICAST> mtu 1500
inet 10.10.10.10 netmask 255.255.255.0 broadcast 10.10.10.255
inet6 fe80::bf14:9efa:7637:744a prefixlen 64 scopeid 0x20<link>
ether 00:0c:29:bc:8b:97 txqueuelen 1000 (Ethernet)
RX packets 0 bytes 0 (0.0 B)
RX errors 0 dropped 0 overruns 0 frame 0
TX packets 33 bytes 3992 (3.8 KiB)
TX errors 0 dropped 0 overruns 0 carrier 0 collisions 0
lo: flags=73<UP,LOOPBACK,RUNNING> mtu 65536
inet 127.0.0.1 netmask 255.0.0.0
inet6 ::1 prefixlen 128 scopeid 0x10<host>
loop txqueuelen 1000 (Local Loopback)
RX packets 118 bytes 11656 (11.3 KiB)
RX errors 0 dropped 0 overruns 0 frame 0
TX packets 118 bytes 11656 (11.3 KiB)
TX errors 0 dropped 0 overruns 0 carrier 0 collisions 0
virbr0: flags=4099<UP,BROADCAST,MULTICAST> mtu 1500
inet 192.168.122.1 netmask 255.255.255.0 broadcast 192.168.122.255
ether 52:54:00:16:29:15 txqueuelen 1000 (Ethernet)
RX packets 0 bytes 0 (0.0 B)
RX errors 0 dropped 0 overruns 0 frame 0
TX packets 0 bytes 0 (0.0 B)
TX errors 0 dropped 0 overruns 0 carrier 0 collisions 0
|
/etc/hosts 설정, 아래 내용 추가 후 저장
|
1
2
3
4
5
6
7
8
9
10
11
12
13
14
15
16
17
|
# vi /etc/hosts
127.0.0.1 localhost localhost.localdomain localhost4 localhost4.localdomain4
::1 localhost localhost.localdomain localhost6 localhost6.localdomain6
##Public
192.168.137.10 oel19db1
192.168.137.20 oel19db2
##Private
10.10.10.10 oel19db1-priv
10.10.10.20 oel19db2-priv
##Virtual
192.168.137.100 oel19db1-vip
192.168.137.200 oel19db2-vip
##SCAN
192.168.137.150 oel19db-scan
|
---ntp 설정은 하지않아도됨---
현재 시간, timezone 확인
|
1
2
3
4
5
6
7
8
|
# timedatectl
Local time: Fri 2021-10-15 18:01:18 KST
Universal time: Fri 2021-10-15 09:01:18 UTC
RTC time: Fri 2021-10-15 09:01:18
Time zone: Asia/Seoul (KST, +0900)
System clock synchronized: no
NTP service: inactive
RTC in local TZ: no
|
ntp 시간 설정
|
1
2
3
4
|
# timedatectl set-timezone Asia/Seoul
# rm -rf /etc/localtime
# ln -s /usr/share/zoneinfo/Asia/Seoul /etc/localtime
# timedatectl set-ntp yes
|
현재 시간, timezone 확인
|
1
2
3
4
5
6
7
8
9
10
|
# date
Fri Oct 15 09:05:43 KST 2021
# timedatectl
Local time: Fri 2021-10-15 09:05:44 KST
Universal time: Fri 2021-10-15 00:05:44 UTC
RTC time: Fri 2021-10-15 09:05:42
Time zone: Asia/Seoul (KST, +0900)
System clock synchronized: yes
NTP service: active
RTC in local TZ: no
|
현재 시간 정상
---ntp 설정은 하지않아도됨---
오라클 설치 전 사전 설정
자동 설정
Linux 8 버전부터는 yum 보다 dnf 로 설치하는게 좋음
|
1
2
|
# curl -o oracle-database-preinstall-19c-1.0-2.el8.x86_64.rpm https://yum.oracle.com/repo/OracleLinux/OL8/appstream/x86_64/getPackage/oracle-database-preinstall-19c-1.0-2.el8.x86_64.rpm
# dnf -y localinstall oracle-database-preinstall-19c-1.0-2.el8.x86_64.rpm
|
자동 설정 후 수동설정 파일 확인
/etc/sysctl.conf에 아래 내용 삽입되었는지 확인(안되어있다면 수동삽입)
|
1
2
3
4
5
6
7
8
9
10
11
12
13
14
15
16
|
# vi /etc/sysctl.conf
fs.file-max = 6815744
kernel.sem = 250 32000 100 128
kernel.shmmni = 4096
kernel.shmall = 1073741824 (또는 물리메모리 크기의 절반(byte))
kernel.shmmax = 4398046511104 (또는 물리메모리 크기의 절반(byte))
kernel.panic_on_oops = 1
net.core.rmem_default = 262144
net.core.rmem_max = 4194304
net.core.wmem_default = 262144
net.core.wmem_max = 1048576
net.ipv4.conf.all.rp_filter = 2
net.ipv4.conf.default.rp_filter = 2
fs.aio-max-nr = 1048576
net.ipv4.ip_local_port_range = 9000 65500
|
위 값은 최소값으로 나의경우 물리메로리를 8GB로 할당했기 때문에 shmall, shmmax를 4294967296(byte) 로 할당함
잘 입력되었는지 확인
|
1
2
3
4
5
6
7
8
9
10
11
12
13
14
15
|
# /sbin/sysctl -p
fs.file-max = 6815744
kernel.sem = 250 32000 100 128
kernel.shmmni = 4096
kernel.shmall = 4294967296
kernel.shmmax = 4294967296
kernel.panic_on_oops = 1
net.core.rmem_default = 262144
net.core.rmem_max = 4194304
net.core.wmem_default = 262144
net.core.wmem_max = 1048576
net.ipv4.conf.all.rp_filter = 2
net.ipv4.conf.default.rp_filter = 2
fs.aio-max-nr = 1048576
net.ipv4.ip_local_port_range = 9000 65500
|
Shell Limits 설정(안되어있다면 수동삽입)
|
1
2
3
4
5
6
7
8
9
|
# vi /etc/security/limits.d/oracle-database-preinstall-19c.conf
oracle soft nofile 1024
oracle hard nofile 65536
oracle soft nproc 16384
oracle hard nproc 16384
oracle soft stack 10240
oracle hard stack 32768
oracle hard memlock 134217728(HugePage 사용시 물리메모리의 90% 이상)
oracle soft memlock 134217728(HugePage 사용시 물리메모리의 90% 이상)
|
memlock soft, hard의 경우 HugePage 사용시 물리메모리의 90% 이상을 할당해야함(나의경우 8GB이기 때문에 8GB의 90%인 7916483719987(byte) 로 할당함)
유저 및 그룹 생성(안되어있다면 수동생성)
|
1
2
|
# groupadd dba
# useradd -g dba -G dba oracle
|
유저 및 그룹 수정(dnf preinstall 이용 자동 생성시)
|
1
|
# usermod -g dba -G dba oracle
|
패스워드 설정
|
1
|
# passwd oracle
|
selinux disable 설정
|
1
2
|
# vi /etc/selinux/config
SELINUX=disabled
|
불필요한 서비스 정지(위에서 ntp 설정을 했다면 chronyd 는 stop,disable,mv 하지 않아도됨)
|
1
2
3
4
5
6
7
8
9
10
11
12
13
14
15
16
17
18
19
20
21
22
|
#
systemctl stop firewalld
systemctl disable firewalld
systemctl stop bluetooth
systemctl disable bluetooth
systemctl stop chronyd
systemctl disable chronyd
mv /etc/chrony.conf /etc/chrony.conf.bak
systemctl stop ntpdate
systemctl disable ntpdate
systemctl stop avahi-daemon.socket
systemctl disable avahi-daemon.socket
systemctl stop avahi-daemon
systemctl disable avahi-daemon
systemctl stop libvirtd
systemctl disable libvirtd
|
asm용 추가 rpm 설치
https://www.oracle.com/linux/downloads/linux-asmlib-v8-downloads.html
에서 oracleasmlib-2.0.17-1.el8.x86_64.rpm 다운로드
https://yum.oracle.com/repo/OracleLinux/OL8/addons/x86_64/index.html
에서 oracleasm-support-2.1.12-1.el8.rpm 다운로드 후 서버에 업로드
|
1
2
3
4
5
6
7
8
9
10
11
12
13
14
15
16
|
# rpm -ivh oracleasmlib-2.0.17-1.el8.x86_64.rpm
Verifying... ################################# [100%]
Preparing... ################################# [100%]
Updating / installing...
1:oracleasmlib-2.0.17-1.el8 ################################# [100%]
/sbin/ldconfig: /etc/ld.so.conf.d/kernel-5.4.17-2102.201.3.el8uek.x86_64.conf:6: hwcap directive ignored
# rpm -ivh oracleasm-support-2.1.12-1.el8.x86_64.rpm
Verifying... ################################# [100%]
Preparing... ################################# [100%]
Updating / installing...
1:oracleasm-support-2.1.12-1.el8 ################################# [100%]
Note: Forwarding request to 'systemctl enable oracleasm.service'.
Synchronizing state of oracleasm.service with SysV service script with /usr/lib/systemd/systemd-sysv-install.
Executing: /usr/lib/systemd/systemd-sysv-install enable oracleasm
/sbin/ldconfig: /etc/ld.so.conf.d/kernel-5.4.17-2102.201.3.el8uek.x86_64.conf:6: hwcap directive ignored
|
oracleasm-support 설치시 hwcap directive ignored 메세지가 나오는데 이 메세지는 무시해도 되는 메세지라고함
Temp 파일시스템 할당
|
1
2
|
# vi /etc/fstab
tmpfs /dev/shm tmpfs size=7g 0 0
|
/dev/shm 영역 remount
|
1
|
# mount -o remount /dev/shm
|
추가 후 확인
|
1
2
3
|
# df -h /dev/shm
Filesystem Size Used Avail Use% Mounted on
tmpfs 7.0G 0 7.0G 0% /dev/shm
|
추가한 디스크 확인(/dev/sdb 30GB)
|
1
2
3
4
5
6
7
8
9
10
11
12
13
14
15
16
17
|
# fdisk -l
Disk /dev/sda: 60 GiB, 64424509440 bytes, 125829120 sectors
Units: sectors of 1 * 512 = 512 bytes
Sector size (logical/physical): 512 bytes / 512 bytes
I/O size (minimum/optimal): 512 bytes / 512 bytes
Disklabel type: dos
Disk identifier: 0xcf1ef965
Device Boot Start End Sectors Size Id Type
/dev/sda1 * 2048 1026047 1024000 500M 83 Linux
/dev/sda2 1026048 125829119 124803072 59.5G 8e Linux LVM
Disk /dev/sdb: 30 GiB, 32212254720 bytes, 62914560 sectors
Units: sectors of 1 * 512 = 512 bytes
Sector size (logical/physical): 512 bytes / 512 bytes
I/O size (minimum/optimal): 512 bytes / 512 bytes
|
디스크 포맷(n --> p --> 1 --> Enter --> Enter --> w)
|
1
2
3
4
5
6
7
8
9
10
11
12
13
14
15
16
17
18
19
20
21
22
23
24
|
# fdisk /dev/sdb
Welcome to fdisk (util-linux 2.32.1).
Changes will remain in memory only, until you decide to write them.
Be careful before using the write command.
Device does not contain a recognized partition table.
Created a new DOS disklabel with disk identifier 0x44b9e099.
Command (m for help): n <-- n 입력
Partition type
p primary (0 primary, 0 extended, 4 free)
e extended (container for logical partitions)
Select (default p): p <-- p 입력
Partition number (1-4, default 1): 1 <-- 1 입력
First sector (2048-62914559, default 2048): <-- 엔터 입력
Last sector, +sectors or +size{K,M,G,T,P} (2048-62914559, default 62914559): <-- 엔터 입력
Created a new partition 1 of type 'Linux' and of size 30 GiB.
Command (m for help): w <-- w 입력
The partition table has been altered.
Calling ioctl() to re-read partition table.
Syncing disks.
|
확인
|
1
2
3
4
5
6
7
8
9
10
11
12
13
14
15
16
17
18
19
20
21
22
|
# fdisk -l
Disk /dev/sda: 60 GiB, 64424509440 bytes, 125829120 sectors
Units: sectors of 1 * 512 = 512 bytes
Sector size (logical/physical): 512 bytes / 512 bytes
I/O size (minimum/optimal): 512 bytes / 512 bytes
Disklabel type: dos
Disk identifier: 0xcf1ef965
Device Boot Start End Sectors Size Id Type
/dev/sda1 * 2048 1026047 1024000 500M 83 Linux
/dev/sda2 1026048 125829119 124803072 59.5G 8e Linux LVM
Disk /dev/sdb: 30 GiB, 32212254720 bytes, 62914560 sectors
Units: sectors of 1 * 512 = 512 bytes
Sector size (logical/physical): 512 bytes / 512 bytes
I/O size (minimum/optimal): 512 bytes / 512 bytes
Disklabel type: dos
Disk identifier: 0x44b9e099
Device Boot Start End Sectors Size Id Type
/dev/sdb1 2048 62914559 62912512 30G 83 Linux
|
Pv Lv 생성
|
1
2
3
4
5
6
7
|
#
pvcreate /dev/sdb1
vgcreate 19c /dev/sdb1
lvcreate -L 2g -n OCR_VOTE1 19c
lvcreate -L 2g -n OCR_VOTE2 19c
lvcreate -L 2g -n OCR_VOTE3 19c
lvcreate -L 20G -n DATA 19c
|
Oracle ASM 설정 및 시작(oracle, dba, y, y 순서대로 입력)
|
1
2
3
4
5
6
7
8
9
10
11
12
13
14
|
# oracleasm configure -i
Configuring the Oracle ASM library driver.
This will configure the on-boot properties of the Oracle ASM library
driver. The following questions will determine whether the driver is
loaded on boot and what permissions it will have. The current values
will be shown in brackets ('[]'). Hitting <ENTER> without typing an
answer will keep that current value. Ctrl-C will abort.
Default user to own the driver interface []: oracle <-- oracle 입력
Default group to own the driver interface []: dba <-- dba 입력
Start Oracle ASM library driver on boot (y/n) [n]: y <-- y 입력
Scan for Oracle ASM disks on boot (y/n) [y]: y <-- y 입력
Writing Oracle ASM library driver configuration: done
|
아래 명령시 /dev/oracleasm 디렉토리가 만들어지고, oracleasm/disks에 라벨링된 디스크가 저장됨
|
1
2
3
4
5
|
# oracleasm init
Creating /dev/oracleasm mount point: /dev/oracleasm
Loading module "oracleasm": oracleasm
Configuring "oracleasm" to use device physical block size
Mounting ASMlib driver filesystem: /dev/oracleasm
|
상태 확인
|
1
2
3
4
5
6
7
8
9
10
11
12
13
|
# oracleasm status
Checking if ASM is loaded: yes
Checking if /dev/oracleasm is mounted: yes
# oracleasm configure
ORACLEASM_ENABLED=true
ORACLEASM_UID=oracle
ORACLEASM_GID=dba
ORACLEASM_SCANBOOT=true
ORACLEASM_SCANORDER=""
ORACLEASM_SCANEXCLUDE=""
ORACLEASM_SCAN_DIRECTORIES=""
ORACLEASM_USE_LOGICAL_BLOCK_SIZE="false"
|
공유 디스크 생성
|
1
2
3
4
5
|
#
oracleasm createdisk OCR_VOTE1 /dev/19c/OCR_VOTE1
oracleasm createdisk OCR_VOTE2 /dev/19c/OCR_VOTE2
oracleasm createdisk OCR_VOTE3 /dev/19c/OCR_VOTE3
oracleasm createdisk DATA01 /dev/19c/DATA
|
디스크 스캔
|
1
2
3
4
5
|
# oracleasm scandisks
Reloading disk partitions:
done
Cleaning any stale ASM disks...
Scanning system for ASM disks...
|
생성 리스트 확인(4개가 나와야 정상)
|
1
2
3
4
5
|
# oracleasm listdisks
DATA01
OCR_VOTE1
OCR_VOTE2
OCR_VOTE3
|
디렉토리 생성 및 권한부여
|
1
2
3
4
5
6
7
8
9
10
11
12
|
#
mkdir -p /oracle/media
mkdir -p /oracle/app/oracle/product/19c
mkdir -p /oracle/app/grid/19c
mkdir -p /oracle/oraInventory
mkdir -p /oraarch
chown -R oracle:dba /oracle
chmod -R 775 /oracle
chown -R oracle:dba /oraarch
chmod -R 775 /oraarch
chown -R oracle:dba /dev/oracleasm
chown -R oracle:dba /dev/19c
|
/oracle/media 경로에 설치파일 업로드
|
1
2
3
4
5
6
7
8
9
|
# chown -R oracle:dba /oracle/media/
# ls -al /oracle/media/
total 8598844
drwxrwxr-x. 2 oracle dba 161 Oct 15 10:26 .
drwxrwxr-x. 5 oracle dba 50 Oct 15 10:24 ..
-rw-r--r--. 1 oracle dba 3059705302 Oct 15 10:26 LINUX.X64_193000_db_home.zip
-rw-r--r--. 1 oracle dba 2889184573 Oct 15 10:26 LINUX.X64_193000_grid_home.zip
-rw-r--r--. 1 oracle dba 2734496202 Oct 15 10:26 p32900083_190000_Linux-x86-64.zip
-rw-r--r--. 1 oracle dba 120761121 Oct 15 10:26 p6880880_190000_Linux-x86-64.zip
|
오라클 계정 설정 .bash_profile에 아래 내용 추가 후 저장
|
1
2
3
4
5
6
7
8
9
10
11
12
13
14
15
16
|
# su - oracle
$ vi .bash_profile
export ORACLE_BASE=/oracle/app/oracle;
export ORACLE_HOME=$ORACLE_BASE/product/19c;
export ORACLE_SID=ORADB1;
export GRID_HOME=/oracle/app/grid/19c;
export GRID_SID=+ASM1;
export PATH=$ORACLE_HOME/bin:$GRID_HOME/bin:$PATH
export LD_LIBRARY_PATH=$ORACLE_HOME/lib:/lib:/usr/lib;
export CLASSPATH=$ORACLE_HOME/jlib:$ORACLE_HOME/rdbms/jlib;
export DISPLAY=192.168.137.1:0.0;
alias grid='export ORACLE_HOME=$GRID_HOME; export ORACLE_SID=$GRID_SID; export PATH=$ORACLE_HOME/bin:$GRID_HOME/bin:$PATH; echo $ORACLE_SID; echo $ORACLE_HOME'
alias db='. ~oracle/.bash_profile;export PATH=$ORACLE_HOME/bin:$GRID_HOME/bin:$PATH; echo $ORACLE_SID;echo $ORACLE_HOME'
alias oh='cd $ORACLE_HOME;pwd'
alias ss='sqlplus / as sysdba'
|
추가 후 적용
|
1
|
$ . ./.bash_profile
|
※ 여기까지 1번 노드 세팅 완료
2번 노드 생성(복사)
1번노드 종료 후 노드1 폴더 자체를 복사

복사한 oel19db1(노드1) -복사본을 oel19db2(노드2)로 변경

oel19db2 폴더로 들어간 뒤 vmx 파일 실행
oel19db2의 vmx파일을 열어서 나온 vm에 Edit virtual machine settings 선택

Network Adapter NAT 선택 후 Advanced 선택

Generate 선택(MAC Address가 변경됨) 후 OK

Network Adapter2 Host-only 선택 후 Advanced 선택

Generate 선택(MAC Address가 변경됨) 후 OK

Options 에서 Virtual machine name을 oel19db1에서 oel19db2로 변경

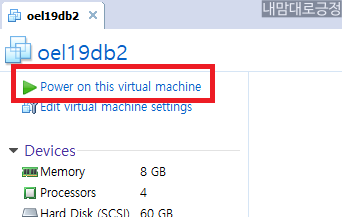
2번노드 oel19db2 OS 기동
I copied it 선택

기동 후 root 로 로그인

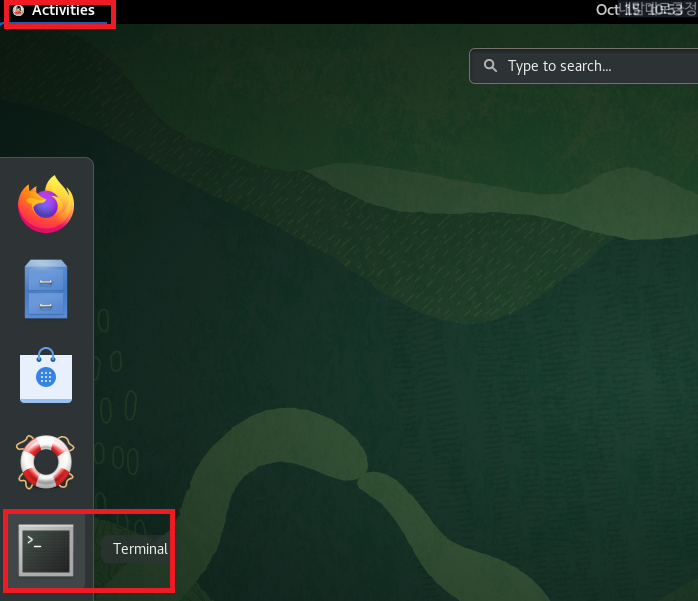
터미널 실행
2번 노드 아이피 변경, 아이피 제일 뒤 10을 20으로 변경
|
1
2
3
4
5
6
7
|
ens32
# vi /etc/sysconfig/network-scripts/ifcfg-ens32
192.138.137.10 -> 192.138.137.20
ens34
# vi /etc/sysconfig/network-scripts/ifcfg-ens34
10.10.10.10 -> 10.10.10.20
|
네트워크 재시작 및 확인
|
1
2
3
4
5
6
7
8
9
10
11
12
13
14
15
16
17
18
19
20
21
22
23
24
25
26
27
28
29
30
31
32
|
# nmcli con down ens32
# nmcli con down ens34
# nmcli con up ens32
# nmcli con up ens34
# systemctl restart NetworkManager.service
# ifconfig
ens32: flags=4163<UP,BROADCAST,RUNNING,MULTICAST> mtu 1500
inet 192.168.137.20 netmask 255.255.255.0 broadcast 192.168.137.255
inet6 fe80::250:56ff:fe37:5588 prefixlen 64 scopeid 0x20<link>
ether 00:50:56:37:55:88 txqueuelen 1000 (Ethernet)
RX packets 71 bytes 15199 (14.8 KiB)
RX errors 0 dropped 0 overruns 0 frame 0
TX packets 86 bytes 11649 (11.3 KiB)
TX errors 0 dropped 0 overruns 0 carrier 0 collisions 0
ens34: flags=4163<UP,BROADCAST,RUNNING,MULTICAST> mtu 1500
inet 10.10.10.20 netmask 255.255.255.0 broadcast 10.10.10.255
inet6 fe80::bf14:9efa:7637:744a prefixlen 64 scopeid 0x20<link>
ether 00:50:56:36:07:9c txqueuelen 1000 (Ethernet)
RX packets 0 bytes 0 (0.0 B)
RX errors 0 dropped 0 overruns 0 frame 0
TX packets 13 bytes 992 (992.0 B)
TX errors 0 dropped 0 overruns 0 carrier 0 collisions 0
lo: flags=73<UP,LOOPBACK,RUNNING> mtu 65536
inet 127.0.0.1 netmask 255.0.0.0
inet6 ::1 prefixlen 128 scopeid 0x10<host>
loop txqueuelen 1000 (Local Loopback)
RX packets 84 bytes 8740 (8.5 KiB)
RX errors 0 dropped 0 overruns 0 frame 0
TX packets 84 bytes 8740 (8.5 KiB)
TX errors 0 dropped 0 overruns 0 carrier 0 collisions 0
|
hostnamectl 명령으로 hostname 변경 oel19db1-> oel19db2 후 재기동
|
1
2
|
# hostnamectl set-hostname oel19db2
# reboot
|
1번노드, 2번노드 모두 OS 기동 후 ping TEST
|
1
2
3
4
5
6
7
|
1번 노드(2번노드의 ip로 ping 시도)
# ping oel19db2
# ping oel19db2-priv
2번 노드(1번노드의 ip로 ping 시도)
# ping oel19db1
# ping oel19db1-priv
|
2번노드 오라클 계정 설정(아래 2가지만 1에서 2로 변경)
|
1
2
3
4
|
# su - oracle
$ vi .bash_profile
export ORACLE_SID=ORADB2;
export GRID_SID=+ASM2;
|
적용
|
1
|
$ . ./.bash_profile
|
다음 게시글로 이동
Oracle Linux 8.4에 Oracle 19c RAC 설치 가이드_Part 2(https://positivemh.tistory.com/763)
참조 :
https://positivemh.tistory.com/761
Oracle Linux 8.4 설치 가이드
OS환경 : Oracle Linux 8.4 (64bit) 방법 : Oracle Linux 8.4 설치 가이드 오라클 리눅스 설치파일은 http://edelivery.oracle.com/ 에서 다운로드 받음 Oracle Linux Release 8 Update 4 for x8..
positivemh.tistory.com
https://positivemh.tistory.com/762
https://positivemh.tistory.com/763
https://positivemh.tistory.com/765
https://positivemh.tistory.com/522
Oracle Linux 7.6에 Oracle 19c RAC 설치 가이드_Part 1
OS환경 : Oracle Linux 7.6 (64bit) DB 환경 : Oracle Database 19.3.0.0 방법 : Oracle Linux 7.6에 Oracle 19c RAC 설치 가이드_Part 1 OS 설치는 아래 게시물 참조 Oracle linux 7.6 설치 가이드(https://posi..
positivemh.tistory.com
https://positivemh.tistory.com/523
Oracle Linux 7.6에 Oracle 19c RAC 설치 가이드_Part 2
OS환경 : Oracle Linux 7.6 (64bit) DB 환경 : Oracle Database 19.3.0.0 OS 및 GRID 설치는 아래 게시물 참조 Oracle Linux 7.6에 Oracle 19c RAC 설치가이드_Part 1(https://positivemh.tistory.com/522) 방법 :..
positivemh.tistory.com
https://positivemh.tistory.com/761
Oracle Linux 8.4 설치 가이드
OS환경 : Oracle Linux 8.4 (64bit) 방법 : Oracle Linux 8.4 설치 가이드 오라클 리눅스 설치파일은 http://edelivery.oracle.com/ 에서 다운로드 받음 Oracle Linux Release 8 Update 4 for x8..
positivemh.tistory.com
https://positivemh.tistory.com/534
/usr/bin/xauth: file /root/.Xauthority does not exist
OS환경 : Oracle Linux 7.6 (64bit) 에러 : /usr/bin/xauth: file /root/.Xauthority does not exist root 계정으로 shell 접속 시 발생하는 메세지 1 2 3 4 5 6 7 8 Xshell:\> Connecting to 192.168.137.50:2..
positivemh.tistory.com
https://positivemh.tistory.com/730
Oracle Linux 7.6에 Oracle 19c 설치와 동시에 패치(applyRU)
환경 : Oracle Linux 7.6 (64bit) DB 환경 : Oracle Database 19.11.0.0 방법 : Oracle Linux 7.6에 Oracle 19c 설치와 동시에 패치(applyRU) 기존에는 rac 설치 시 grid 설치, db엔진 설치 후 패치를 적용..
positivemh.tistory.com
https://hoing.io/archives/6588
'ORACLE > Install' 카테고리의 다른 글
| Oracle Linux 8.4에 Oracle 19c RAC 설치 가이드_Part 3 (9) | 2021.10.15 |
|---|---|
| Oracle Linux 8.4에 Oracle 19c RAC 설치 가이드_Part 2 (17) | 2021.10.15 |
| Oracle Linux 7.6에 Oracle 19c 설치와 동시에 패치(applyRU) (0) | 2021.05.21 |
| Oracle Linux 7.6에 Oracle 19c RAC 삭제 가이드 (2) | 2021.05.21 |
| Oracle 11g R2 RAC PSU 패치 가이드 (10) | 2021.04.17 |